Top 10 Best AIoT (Artificial Intelligence + Internet of Things) Projects for 2025 [Real-World & Cutting-Edge Use Cases]
![Top 10 Best AIoT (Artificial Intelligence + Internet of Things) Projects for 2025 [Real-World & Cutting-Edge Use Cases]](/content/images/size/w1200/2025/06/main-page-pic-3.png)
📡 Introduction: The Dawn of AIoT
The Internet of Things (IoT) ushered in an era where devices gained unprecedented connectivity, allowing them to collect and exchange data like never before. However, the true potential of this data remained largely untapped until the advent of Artificial Intelligence (AI). AI provides the crucial elements of context and cognition, transforming raw data into actionable insights and enabling devices to understand and interpret their environment. It’s the difference between a sensor reporting temperature and an intelligent system predicting equipment failure based on temperature fluctuations, historical data, and operational context.
Now, in 2025, the synergy of these two powerful technologies has culminated in AIoT – Artificial Intelligence of Things. This isn't just a buzzword; AIoT is rapidly becoming the foundational operating system for the future, seamlessly integrating intelligence into every aspect of our connected world. From smart cities optimizing traffic flow and energy consumption to intelligent factories predicting maintenance needs and ensuring product quality, AIoT is at the core.
AIoT is fundamentally redefining how machines interact with their environment and with us. It empowers capabilities ranging from zero-latency responses – crucial for real-time applications like autonomous vehicles, precision agriculture, and advanced robotics where milliseconds matter – to sophisticated autonomous decision-making, where devices can learn, adapt, and act independently without constant human intervention. Imagine a smart home that not only adjusts the thermostat but also predicts your energy usage patterns and optimizes for cost savings and comfort, all while ensuring your security.
Your next project has the potential to be a pivotal part of this transformative wave. Whether you're a developer crafting cutting-edge algorithms, an engineer designing robust edge hardware, or an innovator conceptualizing entirely new services, understanding and leveraging AIoT will be key to creating the next generation of intelligent solutions. The demand for skilled professionals in this domain is skyrocketing, presenting unparalleled opportunities for growth and impact.
To help you navigate this exciting landscape, we've curated a fresh Top 10 list. This list is designed to inspire innovation, facilitate seamless edge deployment of intelligent applications, and ultimately, propel and elevate your career in this rapidly evolving and highly rewarding field. Get ready to build the future, one smart device at a time.
Table of Content:
1. Edge AI Drone for Smart Disaster Response
2. AIoT-Powered Smart Cold Chain Monitor
3. AI-Enhanced Smart Classroom Attendance & Attention System
4. Self-Adaptive Smart Irrigation System Using AI & IoT
5. AI-Based Crowd Density & Flow Tracker for Public Spaces
6. AI-Integrated Smart Vending Machine
7. Intelligent Parking Management System with License Plate Recognition (LPR)
8. AI-Powered Personalized HVAC System
9. Real-Time Wildlife Monitoring System with AI Detection
10. AI-Driven Smart Helmet for Construction Workers
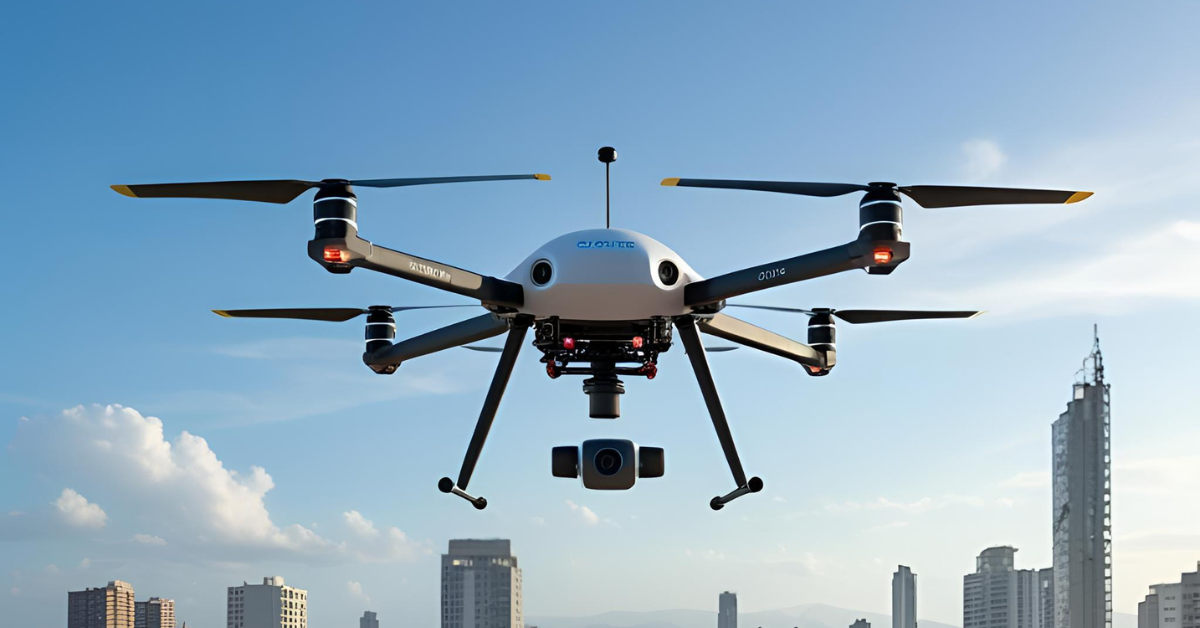
1. Edge AI Drone for Smart Disaster Response
💡 Objective:
Deploy autonomous drones equipped with cutting-edge Edge AI capabilities to rapidly detect survivors, identify fire outbreaks, and assess flood levels in disaster-stricken zones. This project aims to provide real-time, actionable intelligence to first responders, significantly accelerating search and rescue operations and improving overall disaster management efficiency.
🚀 Project Overview:
In the chaotic aftermath of natural disasters, conventional methods of assessment and rescue are often hampered by damaged infrastructure, inaccessible areas, and limited visibility. This project proposes a revolutionary solution: an intelligent drone system that brings AI processing directly to the 'edge' – on board the drone itself. By performing real-time image analysis and environmental sensing on the drone, we eliminate latency associated with cloud-based processing and ensure functionality even in situations with compromised communication networks. The drones will autonomously navigate affected areas, identifying critical elements like human heat signatures, active fire zones, and water levels, then relaying this vital information to a centralized dashboard for immediate tactical response.
🎛️ Components:
- Drone Platform: A robust, agile drone capable of stable flight in challenging conditions (e.g., strong winds, rain).
- Edge AI Processor: Jetson Nano (or similar powerful, compact edge computing device) for on-board AI inference.
- Vision System: Raspberry Pi Camera (Pi Cam) for high-resolution visual data capture, potentially augmented with a thermal camera for night vision and heat signature detection.
- Environmental Sensing: Lidar for precise 3D mapping and obstacle avoidance, enabling navigation in complex, debris-strewn environments. Additional sensors like gas detectors or water level sensors could be integrated.
- Communication Module: Wi-Fi/cellular module for data transmission.
- Power System: High-capacity battery for extended flight times.
💻 Technologies Used:
- Edge Computing: Processing AI models directly on the drone's hardware (Jetson Nano) to minimize latency and ensure autonomy.
- AI Model:
- YOLOv5 (You Only Look Once version 5): A state-of-the-art, real-time object detection algorithm. This will be trained to identify objects of interest such as human forms, vehicles, and specific types of debris.
- Custom Classifiers: Additional machine learning models trained for specific detection tasks like identifying smoke, flames, distinct flood patterns, or even specific distress signals.
- Communication Protocol: MQTT (Message Queuing Telemetry Transport): A lightweight messaging protocol ideal for IoT devices, enabling efficient, low-bandwidth communication between the drone and the ground station/dashboard.
- Cloud Backend/Database: Firebase Dashboard: Provides a real-time database and cloud hosting for visualization of drone data, mission planning, and communication with rescue teams. This acts as the central hub for receiving and displaying the intelligence gathered by the drones.
- Python: The primary programming language for developing the AI models, drone control logic, and data processing scripts.
- ROS (Robot Operating System - potential): While not explicitly listed, ROS could be a valuable framework for managing drone navigation, sensor integration, and communication with various modules.
🌐 Use Cases of the Project:
- Search and Rescue: Rapidly locating survivors in collapsed buildings, dense forests, or flooded areas, especially where human access is dangerous or impossible. Thermal imaging helps detect heat signatures even under debris or in low visibility.
- Damage Assessment: Providing aerial surveys of disaster zones to quickly assess the extent of structural damage, identify blocked roads, and pinpoint critical infrastructure failures (e.g., power lines down, bridges collapsed).
- Fire Detection and Monitoring: Early detection of wildfires or post-disaster secondary fires, monitoring their spread, and guiding firefighting efforts with real-time visual and thermal data.
- Flood Monitoring: Assessing real-time flood levels, identifying inundated areas, and tracking water flow to inform evacuation routes and resource deployment.
- Hazardous Material Detection (expansion): With additional sensors, drones could detect gas leaks or hazardous chemical spills, keeping responders out of immediate danger.
- Resource Delivery (future expansion): Delivering small, essential supplies (e.g., first-aid kits, communication devices) to isolated survivors.
✨ Benefits of this Project:
- Real-time Aerial Intelligence: Provides immediate visual and analyzed data, allowing command centers to make faster, more informed decisions.
- Faster Search & Rescue: Dramatically reduces the time required to locate missing persons, directly increasing survival rates.
- Enhanced Safety for Responders: Drones can access dangerous or unstable environments, minimizing the risk to human rescue teams.
- Improved Situational Awareness: Offers a comprehensive, bird's-eye view of large disaster areas, which is often impossible with ground-based efforts alone.
- Optimized Resource Allocation: Enables efficient deployment of rescue teams, medical aid, and other critical resources to the most affected areas.
- Offline Capability: Edge AI ensures core detection and navigation functions continue even if internet or communication networks are down, which is common in disaster scenarios.
- Cost-Effectiveness: Reduces the need for expensive and often dangerous manned aerial reconnaissance missions.
- Scalability: A fleet of such drones could work collaboratively, covering vast areas more efficiently.
Building an Edge AI drone for disaster response involves several distinct programming areas:
- Drone Flight Control: This often involves specialized libraries or firmwares (like PX4, ArduPilot) and is highly hardware-dependent.
- Edge AI Inference: Running YOLOv5 on Jetson Nano using libraries like PyTorch, TensorFlow Lite, or TensorRT.
- Sensor Integration: Reading data from Pi Camera, Lidar, and other sensors.
- MQTT Communication: Sending detected data to a cloud platform.
- Firebase Integration: Storing and retrieving data for the dashboard.
- Dashboard Development: A web or desktop application to visualize data.
Instead, I will provide conceptual code snippets and outlines for the core AI and communication aspects that would run on the Jetson Nano, along with an example of how you might set up the Firebase part.
Prerequisites on Jetson Nano (Conceptual):
- JetPack SDK installed
- PyTorch/TensorFlow installed (with GPU support)
- OpenCV installed
- Paho MQTT client library installed (
pip install paho-mqtt) - Firebase Admin SDK installed (
pip install firebase-admin)
Project 1: Edge AI Drone for Smart Disaster Response Codes:
🔗 View Project Code on GitHubSteps to Make This Work:
1. Hardware Setup: Assemble your drone, mount Jetson Nano, Pi Camera (and thermal camera), Lidar. Ensure they are powered correctly and connected to the Jetson Nano.
2. Jetson Nano Environment:
Install JetPack SDK.
Set up Python environment.
Install `torch`, `torchvision` (Jetson-specific builds), `opencv-python`, `paho-mqtt`.
Download and set up YOLOv5. You'll need to train your custom YOLOv5 model on images of survivors, fire, flood areas, etc. (This is a significant step itself).
Place your trained `best.pt` file in the specified `YOLO_MODEL_PATH`.
Ensure your camera and Lidar drivers are working and accessible via Python.
3. MQTT Broker: Set up an MQTT broker. You can use a public one for testing (e.g., `broker.hivemq.com`), or deploy your own (e.g., Mosquitto) on a cloud server or a local machine.
4. Firebase Project:
Create a Firebase project in the Google Cloud Console.
Enable Firestore Database.
Go to Project Settings > Service Accounts > Generate new private key. Download `serviceAccountKey.json` and secure it. Place it in the correct path for `firebase_listener.py`.
Configure Firebase Web App for the dashboard.
5. Run the Code:
Run `firebase_listener.py` on your ground station/server.
Run `drone_ai_module.py` on the Jetson Nano (on the drone).
Open `index.html` in a web browser (after setting up the Firebase config and map library).
This provides a comprehensive outline and conceptual code to kickstart your Edge AI Drone for Smart Disaster Response project. Remember that real-world deployment will require robust error handling, power management, advanced drone flight control integration, and extensive testing.
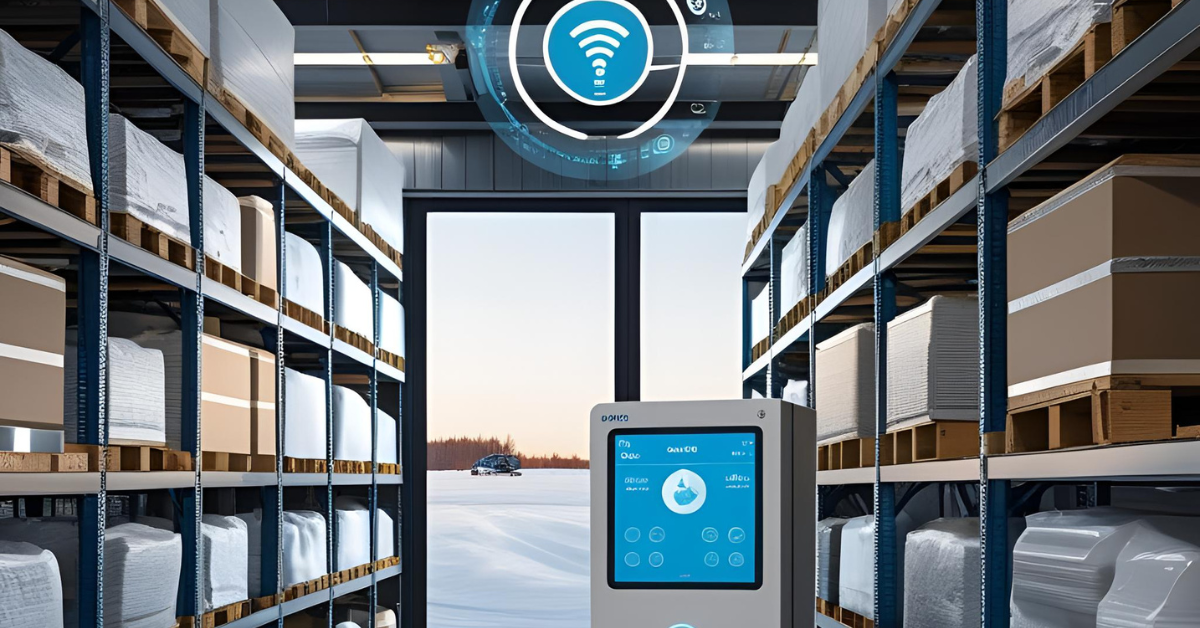
2. AIoT-Powered Smart Cold Chain Monitor
💡 Objective:
To revolutionize cold chain logistics for pharmaceuticals and perishable food items by providing continuous, real-time monitoring of environmental conditions. This system aims to maintain product integrity, predict potential spoilage events through anomaly detection, and issue proactive alerts, thereby minimizing waste, ensuring compliance with regulatory standards, and safeguarding public health.
🚀 Project Overview:
The cold chain is a critical component in the distribution of sensitive goods, where even minor deviations in temperature or humidity can lead to spoilage, loss of efficacy for pharmaceuticals, and significant financial losses. This project introduces an AIoT solution that goes beyond basic data logging. It leverages low-power IoT devices (ESP32) equipped with sensors to collect real-time environmental data (temperature, humidity, location). This data is then securely transmitted to the cloud (AWS IoT Core) where an AI model, specifically a Time-Series Anomaly Detection Autoencoder, continuously analyzes the incoming data streams. Instead of just reporting out-of-spec conditions, the system learns normal operating patterns and identifies subtle deviations that could indicate a future problem or an ongoing, unnoticed issue. This predictive capability allows for immediate intervention, preventing costly spoilage and ensuring product quality from source to destination.
🎛️ Components:
- Microcontroller & Connectivity Module: ESP32 – A versatile, low-cost, and power-efficient microcontroller with integrated Wi-Fi and Bluetooth capabilities, ideal for IoT edge devices. It can collect sensor data and transmit it wirelessly.
- Temperature & Humidity Sensor: DHT22 (or similar, e.g., BME280 for more accuracy) – A digital sensor providing reliable readings for both temperature and relative humidity, critical parameters for cold chain monitoring.
- Location Tracking Module: GPS Module (e.g., NEO-6M) – Provides real-time geographical coordinates, allowing for tracking the exact location of the goods throughout their journey. This helps pinpoint where and when a cold chain breach occurred.
- Power Source: Long-lasting battery pack (e.g., LiPo battery with power management circuit) – Essential for continuous monitoring during transit without external power.
- Enclosure: A robust, insulated, and potentially waterproof casing to protect the electronics from environmental factors and physical damage.
💻 Technologies Used:
- Edge Device Firmware: Programmed on the ESP32 using Arduino IDE with ESP-IDF or MicroPython. Handles sensor readings, data formatting, and secure communication.
- Cloud IoT Platform: AWS IoT Core – A fully managed cloud service that allows connected devices to easily and securely interact with cloud applications and other devices. It handles device registration, authentication, message routing, and device shadow services.
- Cloud Data Storage: AWS S3 (for raw data storage) or AWS Timestream (for time-series data optimized storage) – To store the large volumes of sensor data collected over time for analysis and historical tracking.
- Machine Learning Service: Amazon SageMaker – A comprehensive service for building, training, and deploying machine learning models at scale.
- AI Model: Time-Series Anomaly Detection using Autoencoders.
- Autoencoders: Neural networks trained to compress and then reconstruct their input. When exposed to normal time-series data (temperature, humidity, GPS patterns), an autoencoder learns to reconstruct it effectively. However, when presented with anomalous data, its reconstruction error will be significantly higher, indicating an anomaly.
- Implementation: Can be built using frameworks like TensorFlow or PyTorch within SageMaker.
- AI Model: Time-Series Anomaly Detection using Autoencoders.
- Data Streaming & Processing: AWS Kinesis (for real-time data streaming) or AWS Lambda (for event-driven data processing) – To ingest and pre-process data before feeding it to SageMaker for inference or storing it.
- Alerting & Notification Services: AWS SNS (Simple Notification Service) or AWS Lambda integrating with email/SMS/messaging platforms (e.g., Slack, PagerDuty) – To send immediate alerts when anomalies or threshold breaches are detected.
- Visualization & Dashboard: AWS QuickSight or a custom web application (using AWS Amplify, React/Vue.js) – To provide a user-friendly interface for monitoring cold chain conditions, viewing historical data, and managing alerts.
🌐 Use Cases of the Project:
- Pharmaceutical Logistics: Monitoring vaccines, biologics, and other temperature-sensitive drugs from manufacturing to patient delivery, ensuring efficacy and compliance with GxP (Good Practice) regulations.
- Food and Beverage Transport: Tracking perishable goods like fresh produce, dairy products, meat, and frozen foods to prevent spoilage, reduce food waste, and maintain quality for consumers.
- Organ and Blood Transport: Critical for maintaining the viability of organs for transplant and blood products, where precise temperature control is paramount.
- Chemical and Industrial Transport: Monitoring temperature-sensitive chemicals or materials that could degrade or become hazardous if not stored/transported within specific environmental limits.
- Floriculture and Horticulture: Ensuring optimal conditions for cut flowers and live plants to extend their shelf life and maintain freshness during shipping.
- Museum and Art Logistics: Monitoring environmental conditions during the transport of sensitive artifacts and artworks to prevent damage.
✨ Benefits of this Project:
- Reduced Spoilage and Waste: Proactive identification of cold chain breaches prevents product degradation, leading to significant cost savings and reduced environmental impact.
- Enhanced Product Quality & Safety: Ensures that goods arrive in optimal condition, preserving their effectiveness (pharmaceuticals) or freshness (food), directly impacting public health and consumer satisfaction.
- Regulatory Compliance: Provides an immutable, auditable record of environmental conditions throughout the cold chain, helping businesses meet strict industry regulations (e.g., FDA for pharmaceuticals).
- Predictive Maintenance: The anomaly detection model can not only identify current issues but also predict potential equipment malfunctions (e.g., a refrigeration unit slowly losing efficiency), enabling preventative maintenance.
- Improved Operational Efficiency: Real-time visibility allows logistics managers to identify problematic routes or carriers, optimize processes, and respond immediately to critical events.
- Data-Driven Decision Making: Gathers vast amounts of data that can be analyzed over time to optimize routes, improve packaging, and refine cold chain management strategies.
- Increased Customer Trust: Assures end-users and consumers of the integrity and quality of the products they receive.
- Cost Savings: Beyond spoilage reduction, it minimizes the financial burden associated with product recalls, reshipping, and potential legal liabilities due to cold chain failures.
- Scalability: The cloud-based architecture (AWS IoT Core, SageMaker) allows for easy scaling from a few devices to thousands, accommodating growing business needs.
I will provide conceptual code outlines and key snippets for the most critical parts:
- ESP32 Firmware (Arduino C++): Code to read sensor data, get GPS coordinates, and publish to AWS IoT Core.
- AWS Lambda Function (Python): A function to ingest data from AWS IoT Core, trigger SageMaker inference, and store data.
- SageMaker (Conceptual Python/TensorFlow/Keras): A simplified outline of the Autoencoder model for anomaly detection.
Project 2: AIoT-Powered Smart Cold Chain Monitor Codes:
🔗 View Project Code on GitHubKey Considerations for a Real-World Project:
- Security: Device certificates are crucial for AWS IoT Core. Implement secure key storage on the ESP32.
- Power Management: Deep Sleep modes on ESP32 are essential for long battery life. Only wake up for sensor readings and transmission.
- Offline Capability: What happens if the device loses connectivity? Store data locally and send when connectivity resumes.
- Data Validation: Implement robust checks for sensor readings (e.g., reasonable ranges).
- Time Synchronization: Use NTP (Network Time Protocol) on the ESP32 to get accurate timestamps instead of millis(), which resets.
- SageMaker Training Data: The quality and quantity of your "normal" cold chain data are paramount for effective anomaly detection. You'll need diverse normal operating conditions.
- Anomaly Threshold Tuning: This is critical. It involves experimentation to find a balance between false positives and false negatives.
- Dashboard: A full-fledged dashboard would use Firebase, AWS Amplify, or another web hosting solution to visualize real-time data, display alerts, and allow historical analysis.
- Deployment: Use AWS CloudFormation or CDK to manage your AWS resources (IoT Core rules, Lambda, SageMaker endpoint, DynamoDB tables).

🚀 Ready to turn your passion for connected intelligence into real-world impact?
At Huebits, we don’t just teach IoT or AI — we train you to fuse them into powerful, intelligent systems that sense, learn, and act in real time.
From smart edge devices to AI-driven cloud platforms, you’ll gain hands-on experience designing end-to-end AIoT architectures — where sensors meet machine learning and systems evolve from reactive to predictive.
🧠 Whether you're a student, aspiring AIoT engineer, or future architect of smart systems, our Industry-Ready IoT (IoT) Program is your launchpad.
Master Python, Embedded C, TinyML, MQTT, REST APIs, ESP32, Raspberry Pi, TensorFlow Lite, AWS IoT, Azure AI Services, and more — all by building real-world AIoT solutions that generate insights, not just data.
🎓 Next Cohort Starts Soon!
🔗 Join now and secure your role in the AIoT revolution powering tomorrow’s ₹1 trillion+ intelligent economy.
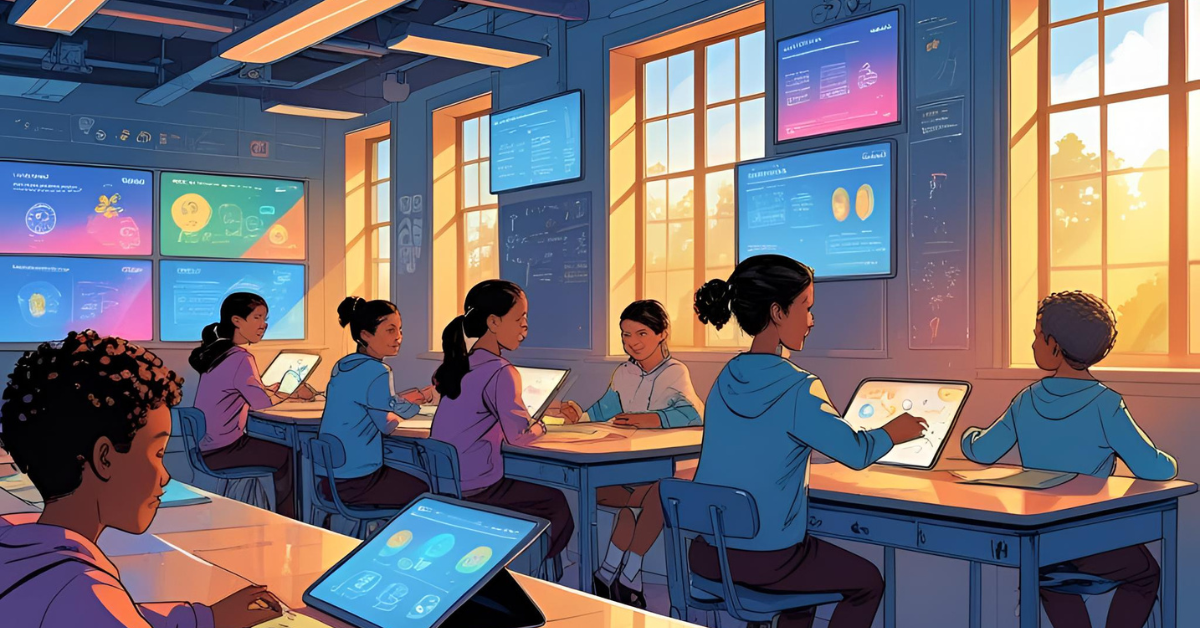
3. AI-Enhanced Smart Classroom Attendance & Attention System
💡 Objective:
To automate and enhance traditional classroom management by leveraging Artificial Intelligence for real-time attendance marking and student engagement monitoring. This system aims to accurately identify students for attendance using facial recognition and assess their attention levels through posture detection, providing valuable analytics to educators for improved teaching strategies and personalized student support.
🚀 Project Overview:
Traditional methods of taking attendance are time-consuming and prone to errors, while monitoring student attention in a large classroom is challenging for instructors. This project proposes an innovative AIoT solution that transforms the physical classroom into an intelligent environment. By deploying a low-cost, edge-based system (Raspberry Pi with dual cameras), it captures live video streams. Onboard AI models, specifically FaceNet for robust facial recognition and MediaPipe for accurate pose estimation, process these streams in real-time. FaceNet identifies enrolled students to automatically mark their attendance, while MediaPipe analyzes body posture (e.g., slouching, head down) to infer attention levels. The processed data – attendance logs, attention metrics, and potential engagement trends – are then securely transmitted to a real-time cloud database (Firebase). This system not only streamlines administrative tasks but also provides educators with unprecedented insights into classroom dynamics, enabling them to adapt their teaching styles, identify struggling students, and foster a more engaging learning environment.
🎛️ Components:
- Edge Computing Device: Raspberry Pi (e.g., Raspberry Pi 4 Model B) – A compact, low-power single-board computer powerful enough to run lightweight AI models at the edge. It serves as the central processing unit for camera inputs and AI inference.
- Vision System:
- Dual Cameras: Two Raspberry Pi Camera Modules (or compatible USB cameras) – Strategically positioned to ensure comprehensive coverage of the classroom. One camera might focus on facial recognition for attendance, while the other captures wider angles for full-body posture analysis.
- Power Supply: A reliable power adapter for continuous operation of the Raspberry Pi and connected peripherals.
- Network Connectivity: Built-in Wi-Fi or Ethernet adapter on the Raspberry Pi for transmitting data to the cloud database.
- Enclosure: A discreet and secure enclosure for the Raspberry Pi and cameras, protecting them from tampering and ensuring optimal positioning.
💻 Technologies Used:
- Edge Computing: Processing AI models directly on the Raspberry Pi. This minimizes latency, reduces bandwidth usage, and ensures the system functions even with intermittent internet connectivity, keeping sensitive data localized as much as possible.
- AI Models:
- FaceNet: A neural network that learns a mapping from face images to a compact Euclidean space where distances directly correspond to a measure of face similarity.1 It's highly effective for facial recognition, converting faces into embeddings that can then be compared for identification. Pre-trained models can be fine-tuned or directly used for student recognition.
- Pose Estimation (MediaPipe): A Google framework providing fast and accurate solutions for various perception tasks. Specifically, MediaPipe Pose (or similar models like OpenPose) can detect key anatomical landmarks (joints, limbs) on the human body. This data is crucial for analyzing posture and inferring attention levels (e.g., detecting if a student is facing forward, resting their head, or slouching).
- Computer Vision Library: OpenCV (Open Source Computer Vision Library) – Essential for handling video streams from the cameras, pre-processing images (resizing, grayscale conversion), drawing bounding boxes and keypoints, and integrating with the AI models.
- Real-time Database: Firebase Realtime Database (or Firestore) – A NoSQL cloud database that allows for real-time synchronization of data across multiple clients. It's used to store attendance logs, attention metrics, student profiles (e.g., face embeddings), and classroom configurations, providing immediate updates to the dashboard.
- Programming Language: Python – The primary language for implementing the core logic on the Raspberry Pi, integrating with OpenCV, running AI inference models (TensorFlow/PyTorch/MediaPipe APIs), and communicating with Firebase.
- Cloud Functions (Optional): Firebase Cloud Functions or AWS Lambda could be used for server-less backend logic, such as aggregating daily attendance, generating reports, or triggering alerts.
- Dashboard/Frontend (Conceptual): A web or mobile application (built with React, Angular, Vue.js, or Flutter/React Native) to visualize attendance, attention trends, and generate reports for educators and administrators.
🌐 Use Cases of the Project:
- Automated Attendance Tracking: Eliminates manual roll calls, saving valuable class time and improving accuracy by automatically marking students present as they enter and are recognized.
- Engagement Monitoring & Early Intervention: Provides educators with real-time insights into overall classroom attention levels or specific students who might be disengaged, allowing for timely intervention or adjustment of teaching methods.
- Personalized Learning Support: Identifies students consistently showing signs of inattention, prompting instructors to offer individualized support or check for underlying issues.
- Classroom Layout Optimization: Data on student attention in different seating areas can inform better classroom arrangements.
- Performance Analytics: Correlates attention data with academic performance to understand the impact of engagement on learning outcomes.
- Hybrid Learning Environments: Can be adapted for monitoring engagement in remote or hybrid learning setups by analyzing webcam feeds (with privacy considerations).
- Post-Class Analysis: Provides data for post-class reviews, allowing educators to identify segments of the lecture where engagement dipped and refine future content delivery.
✨ Benefits of this Project:
- Time-Saving for Educators: Eliminates the administrative burden of manual attendance, freeing up valuable class time for teaching.
- Improved Accuracy and Objectivity: Automates attendance with higher precision than manual methods and provides objective metrics for attention.
- Enhanced Student Engagement: By providing insights into attention patterns, educators can develop more effective and engaging teaching strategies.
- Early Identification of At-Risk Students: Helps pinpoint students who may be struggling or disengaged, allowing for proactive support before academic issues escalate.
- Data-Driven Educational Insights: Provides rich data for research into learning effectiveness, classroom dynamics, and pedagogical improvements.
- Reduced Administrative Overhead: Streamlines record-keeping and reporting for educational institutions.
- Non-Intrusive Monitoring: Unlike active polling or questioning, posture detection offers a less intrusive way to gauge general attention.
- Scalability & Cost-Effectiveness: Built on low-cost hardware (Raspberry Pi) and cloud services, making it scalable for deployment across multiple classrooms or institutions.
- Modernizes Education: Positions institutions at the forefront of educational technology, attracting tech-savvy students and faculty.
Building this project involves several distinct, complex coding efforts:
- Raspberry Pi (Python):
- Camera stream capture (using OpenCV).
- Face detection (e.g., MTCNN or Haar cascades, then alignment for FaceNet).
- FaceNet inference (getting embeddings).
- Face recognition (comparing embeddings to a database of known student embeddings).
- MediaPipe Pose inference (getting keypoints).
- Posture analysis logic (interpreting keypoints for attention).
- Firebase Realtime Database client interaction (sending data).
- Firebase Realtime Database (Setup): JSON structure definition for data.
- Firebase Cloud Functions (Node.js/Python - optional but good for backend logic): For aggregating data, generating reports, or triggering alerts.
- Dashboard (Web/Mobile Frontend - e.g., React/Vue/Angular/Flutter):
- Firebase client interaction (listening for real-time updates).
- Data visualization (charts, attendance lists, heatmaps).
I will provide conceptual code snippets and outlines for the core AI and Firebase interaction parts that would run on the Raspberry Pi, along with an example of how you might set up the Firebase database rules.
Prerequisites on Raspberry Pi (Conceptual):
- Raspberry Pi OS (or similar Linux distro)
- Python 3.x
- OpenCV (
pip install opencv-python) - TensorFlow/TensorFlow Lite (for FaceNet) (
pip install tensorfloworpip install tflite-runtimeif using TFLite for optimization) - MediaPipe (
pip install mediapipe) - Firebase Admin SDK for Python (
pip install firebase-admin) - For camera access:
picameralibrary if using CSI cameras, or standard OpenCVVideoCapturefor USB.
Project 3: AI-Enhanced Smart Classroom Attendance & Attention System Codes:
🔗 View Project Code on GitHubSteps to Implement and Run (Conceptual):
- Firebase Project Setup:
- Go to the Firebase Console, create a new project.
- Enable Realtime Database.
- Go to Project Settings -> Service Accounts -> Generate new private key. Download
serviceAccountKey.jsonand place it on your Raspberry Pi. - Go to Realtime Database -> Rules and set initial permissive rules for testing, or implement more secure rules as shown above.
- Raspberry Pi Setup:
- Install Raspberry Pi OS.
- Enable camera interface (if using CSI camera).
- Install Python, OpenCV, MediaPipe, TensorFlow/TensorFlow Lite, Firebase Admin SDK.
- Transfer
classroom_monitor.pyand yourserviceAccountKey.jsonto the Pi. - Get a pre-trained FaceNet model (e.g., from GitHub repos that provide Keras models or convert one to TFLite).
- Prepare student enrollment images (one clear face per student) and set up the
enroll_studentfunction.
- Enroll Students: Run the
enroll_studentfunction (or a separate enrollment script) for each student you want the system to recognize. This will populate your Firebasestudentsnode with their embeddings. - Run the Monitor: Execute
python3 classroom_monitor.pyon your Raspberry Pi. - Dashboard (Separate Effort): Develop your web or mobile dashboard that connects to the same Firebase Realtime Database to display the live attendance and attention data.
Important Considerations:
- Privacy and Ethics: Facial recognition and attention monitoring raise significant privacy concerns. This system should only be deployed with explicit consent from students, parents/guardians, and full transparency. Clear policies on data retention, access, and usage are critical. Anonymization or aggregate data reporting might be preferred for attention metrics.
- Accuracy: FaceNet and MediaPipe are powerful, but real-world conditions (lighting, angles, occlusions) can affect accuracy. Robust error handling and continuous improvement of the models will be necessary.
- Scalability: While Firebase handles real-time updates well, processing video streams for many students simultaneously on a single Raspberry Pi might hit performance limits. For larger classrooms or multiple classrooms, more powerful edge devices (e.g., Jetson Nano) or distributed processing might be needed.
- Offline Mode: Consider how the system behaves if internet connectivity is lost. Can it store data locally and sync later?
- User Interface for Enrollment/Management: A proper system would have a user-friendly interface for enrolling new students, managing profiles, and viewing reports, not just command-line scripts.
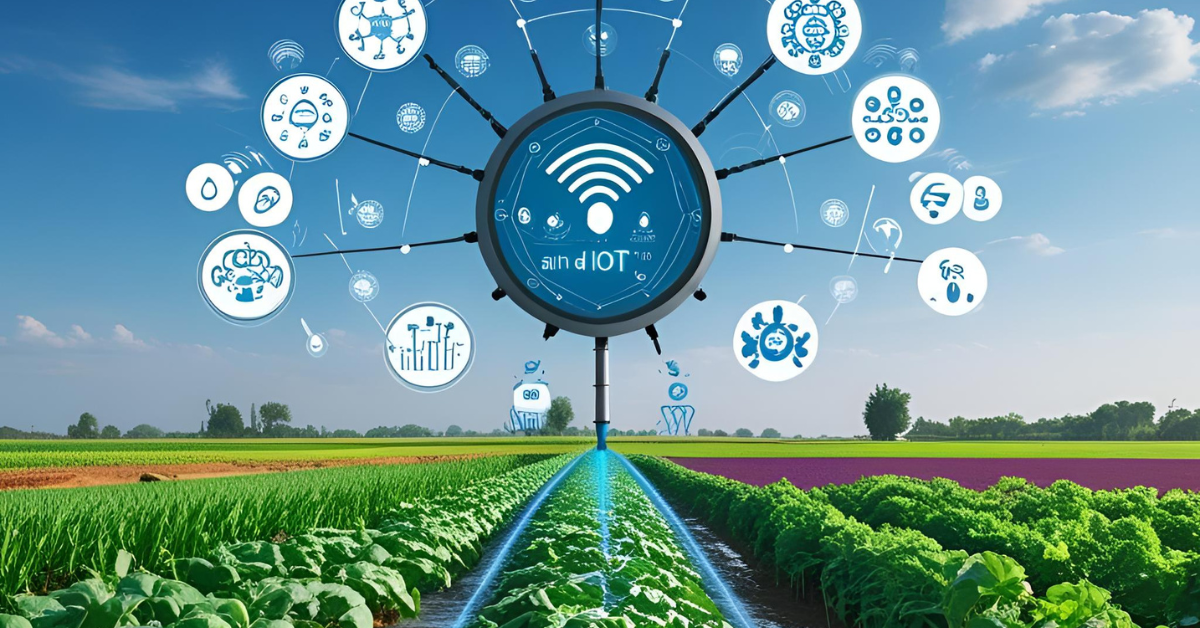
4. Self-Adaptive Smart Irrigation System Using AI & IoT
💡 Objective:
To develop an intelligent and autonomous irrigation system that drastically optimizes water usage in agriculture. By integrating real-time data from soil, weather conditions, and specific crop requirements with machine learning predictions, the system aims to determine and deliver the precise amount of water needed, when and where it's needed, ensuring healthy crop growth while achieving up to 40% water savings.
🚀 Project Overview:
Traditional irrigation often relies on fixed schedules or manual observation, leading to significant water waste through overwatering or crop stress due to underwatering. This project introduces a self-adaptive smart irrigation system that leverages the power of AIoT to create a truly responsive and efficient solution. Low-cost IoT nodes, built around an Arduino microcontroller, are deployed in agricultural fields. These nodes are equipped with sensors to continuously gather critical environmental data: soil moisture levels, ambient temperature, and humidity. A GSM module ensures reliable data transmission even in remote areas with limited Wi-Fi infrastructure. This real-time sensor data is securely pushed to a cloud IoT platform (Azure IoT Hub). In the cloud, an advanced AI model, specifically an XGBoost Regression model, is trained on historical and live data to predict the optimal water quantity required for different crop types under varying conditions. The system then sends commands back to the irrigation actuators (e.g., valves, pumps) based on these predictions, creating a closed-loop system that intelligently adapts irrigation cycles, minimizes waste, and fosters sustainable agricultural practices.
🎛️ Components:
- Microcontroller: Arduino (e.g., Arduino Uno, Mega, or ESP32/ESP8266 if integrating Wi-Fi/Bluetooth directly for different connectivity options) – Serves as the brain of the edge node, reading sensor data, processing it, and controlling the irrigation actuators.
- Soil Moisture Sensor: Capacitive soil moisture sensor – Provides non-corrosive, continuous readings of the moisture content in the soil. Multiple sensors can be deployed across a field for localized data.
- Environmental Sensor: DHT11 (or DHT22/BME280 for higher accuracy) – Measures ambient air temperature and humidity, crucial factors influencing evapotranspiration and water demand.
- Connectivity Module: GSM Module (e.g., SIM900A, SIM800L) – Enables communication with the cloud platform over cellular networks, making the system viable in remote agricultural areas lacking Wi-Fi infrastructure. This allows for sending sensor data and receiving commands.
- GPS Module (Optional but Recommended): For precise location tagging of each sensor node within a large field, enabling spatially aware irrigation.
- Relay Module: To switch on/off irrigation pumps or open/close solenoid valves based on commands received from the cloud.
- Water Pump/Solenoid Valves: Actuators that control the flow of water to specific zones or individual plants.
- Power Supply: Battery (e.g., 12V lead-acid or LiFePO4 with solar charging) for autonomous operation in the field.
- Weather Station (Optional, for more comprehensive data): Anemometer (wind speed), rain gauge (rainfall), pyranometer (solar radiation) – Provides localized weather data for more accurate water demand prediction.
💻 Technologies Used:
- Edge Device Firmware: Programmed on Arduino using C++ or Python (with MicroPython on ESP32/ESP8266). Manages sensor data acquisition, basic data processing, and communication with the GSM module.
- Cloud IoT Platform: Azure IoT Hub – A fully managed cloud service that enables secure, bi-directional communication between millions of IoT devices and a cloud solution. It handles device provisioning, authentication, message routing, and device twin synchronization for command & control.
- Cloud Data Storage: Azure Data Lake Storage, Azure SQL Database, or Azure Cosmos DB – For storing raw sensor data, processed data, and historical records for model training and auditing.
- Machine Learning Service: Azure Machine Learning – A comprehensive platform for building, training, and deploying machine learning models.
- AI Model: XGBoost Regression (Extreme Gradient Boosting) – A highly efficient and effective machine learning algorithm for regression tasks. It is ideal for predicting optimal water requirements as it can handle diverse data types (numerical, categorical), missing values, and complex non-linear relationships between variables (e.g., soil moisture, temperature, humidity, rainfall, crop type, growth stage) and the target variable (water needed).
- Data Streaming & Processing: Azure Stream Analytics or Azure Functions – To ingest real-time data from IoT Hub, preprocess it, and feed it to the XGBoost model for inference, as well as trigger actions (e.g., send commands back to devices, store results).
- Alerting & Notification Services: Azure Logic Apps or Azure Functions integrating with Azure Notification Hubs – To send alerts via SMS, email, or mobile app notifications when anomalies are detected (e.g., sensor failure, extreme conditions) or when irrigation is activated/deactivated.
- Visualization & Dashboard: Azure Power BI or a custom web application (using Azure App Service, React/Angular/Vue.js) – To provide farmers and agricultural managers with a user-friendly interface to monitor field conditions, view irrigation schedules, track water savings, and manage system parameters.
🌐 Use Cases of the Project:
- Precision Agriculture: Optimizing irrigation for various crops (e.g., corn, wheat, vegetables, fruits) based on their specific water needs at different growth stages and soil types.
- Vineyards and Orchards: Delivering precise water amounts to individual vines or trees, critical for quality and yield.
- Commercial Greenhouses: Maintaining ideal humidity and soil moisture levels in controlled environments, minimizing resource consumption.
- Smart Home/Garden Systems: Adapting irrigation for residential lawns and gardens, preventing overwatering and promoting healthier plants.
- Drought-Prone Regions: Maximizing the efficiency of scarce water resources to sustain agricultural output.
- Research & Development: Collecting vast datasets on environmental conditions and crop responses for further agricultural research and predictive modeling.
- Landscape Management: Efficiently managing water for parks, golf courses, and public green spaces.
✨ Benefits of this Project:
- Significant Water Savings (Up to 40%): By eliminating overwatering and delivering only what's needed, the system dramatically conserves water, a crucial resource.
- Improved Crop Health & Yield: Prevents both underwatering and overwatering, leading to healthier plants, reduced disease risk, and potentially higher crop yields.
- Reduced Operational Costs: Lowers water bills, minimizes energy consumption for pumping, and reduces labor required for manual irrigation monitoring.
- Environmental Sustainability: Contributes to water conservation efforts, reduces runoff of fertilizers (which can pollute waterways), and promotes more environmentally friendly farming.
- Data-Driven Decision Making: Provides valuable insights into field conditions and irrigation effectiveness, enabling farmers to make informed long-term agricultural decisions.
- Remote Monitoring & Control: Farmers can monitor and manage their irrigation systems from anywhere, anytime, through a dashboard or mobile app.
- Adaptability to Changing Conditions: The AI model continuously learns and adapts to fluctuating weather patterns, climate change effects, and varying crop needs.
- Compliance & Reporting: Generates detailed logs of water usage and environmental conditions, aiding in compliance reporting for various agricultural certifications.
- Scalability: Designed to be scalable from small farms to large agricultural enterprises by deploying multiple IoT nodes.
it involves:
- Arduino Firmware (C++): For reading sensors, communicating with GSM module, and controlling relays.
- Azure IoT Hub Setup: Device registration, routing rules, message ingestion.
- Azure Functions (Python/C#): To process messages from IoT Hub, interact with Azure ML endpoint, and send commands back.
- Azure Machine Learning (Python): For training and deploying the XGBoost model.
- Azure Storage: For data persistence.
- Dashboard (Web/Power BI): For visualization.
Instead, I will provide conceptual code outlines and key snippets for the most critical parts:
- Arduino Sketch (C++): Sensor reading, GSM communication, and sending data to Azure IoT Hub.
- Azure Function (Python): An example of how to receive data from IoT Hub, call a (conceptual) Azure ML endpoint, and potentially send a command.
- XGBoost Model Training (Python): A simplified example of training an XGBoost model in Python.
Project 4: Self-Adaptive Smart Irrigation System Using AI & IoT Codes:
🔗 View Project Code on GitHubSteps to Build and Deploy (Conceptual):
- Azure Setup:
- Create an Azure account and an IoT Hub.
- Register your device (e.g., irrigationNode001) in IoT Hub and get its connection string/SAS token.
- Create an Azure Storage Account (for data persistence).
- Create an Azure Machine Learning Workspace.
- Create an Azure Function App (consumption plan recommended for cost).
- Set up Event Hub Trigger for your Azure Function (connect it to your IoT Hub's built-in endpoint).
- Configure environment variables in your Azure Function App settings (AZURE_ML_ENDPOINT_URL, AZURE_ML_API_KEY, IOTHUB_CONNECTION_STRING, DYNAMODB_TABLE_NAME if you use one).
- Arduino Firmware:
- Write the C++ code for Arduino.
- Flash it onto your Arduino board.
- Wire up the sensors, GSM module, and relay.
- Data Collection for ML:
- Crucial Step: Collect a substantial dataset of sensor readings, actual water applied (or optimal water determined by experts/experiments), and crop data over time for various conditions. This is the training data for your XGBoost model. Store this data in Azure Storage.
- Azure ML Model Training & Deployment:
- Use the conceptual Python script (or a more elaborate one) within an Azure ML notebook or run as a script.
- Train your XGBoost model using your collected data.
- Register the trained model in Azure ML.
- Deploy the model as a real-time endpoint. Note down the endpoint URL and API key.
- Azure Function Deployment:
- Deploy your Python Azure Function code to your Function App.
- Ensure it has the necessary permissions (Managed Identity) to call the Azure ML endpoint and send C2D messages to IoT Hub.
- Dashboard:
- Build a Power BI dashboard connected to your Azure storage (where processed data is stored).
- Alternatively, develop a custom web application that reads data from Azure (e.g., Cosmos DB or Azure SQL) and provides control/monitoring.
This comprehensive breakdown, including conceptual code, should give you a solid foundation for building a self-adaptive smart irrigation system.

🚀 Ready to turn your passion for connected intelligence into real-world impact?
At Huebits, we don’t just teach IoT or AI — we train you to fuse them into powerful, intelligent systems that sense, learn, and act in real time.
From smart edge devices to AI-driven cloud platforms, you’ll gain hands-on experience designing end-to-end AIoT architectures — where sensors meet machine learning and systems evolve from reactive to predictive.
🧠 Whether you're a student, aspiring AIoT engineer, or future architect of smart systems, our Industry-Ready IoT (IoT) Program is your launchpad.
Master Python, Embedded C, TinyML, MQTT, REST APIs, ESP32, Raspberry Pi, TensorFlow Lite, AWS IoT, Azure AI Services, and more — all by building real-world AIoT solutions that generate insights, not just data.
🎓 Next Cohort Starts Soon!
🔗 Join now and secure your role in the AIoT revolution powering tomorrow’s ₹1 trillion+ intelligent economy.
5. AI-Based Crowd Density & Flow Tracker for Public Spaces
💡 Objective:
To enhance public safety and optimize urban planning by intelligently monitoring crowd density and movement patterns in public spaces. This system aims to automatically count people, track their flow, identify areas of congestion, and issue real-time alerts when predefined crowd density thresholds are breached, enabling proactive management of public safety and efficient resource allocation.
🚀 Project Overview:
Managing crowd dynamics in public spaces like train stations, shopping malls, event venues, or city squares is crucial for safety, operational efficiency, and security. Traditional methods are often manual, inaccurate, and reactive. This project introduces a cutting-edge AIoT solution that brings advanced computer vision capabilities to the edge. Low-cost, compact devices, specifically ESP32-CAM modules augmented with Edge TPUs (Tensor Processing Units), are strategically deployed to capture video streams. The Edge TPU accelerates the inference of AI models, primarily YOLOv8 (You Only Live Once, version 8), for highly efficient real-time people counting. Additionally, clustering algorithms analyze the detected people's positions over time to understand crowd density, identify static clusters, and track the direction and speed of crowd flow. This real-time, actionable intelligence is then securely transmitted to the cloud (Google Cloud IoT Core) where it can be visualized on a dashboard, trigger automated alerts (e.g., to emergency services or facility management), and inform long-term urban planning and public safety strategies.
🎛️ Components:
- Edge AI Vision Module: ESP32-CAM – A compact, cost-effective Wi-Fi enabled microcontroller board with an integrated camera. It's ideal for capturing video streams at the edge.
- AI Accelerator: Edge TPU (e.g., Google Coral USB Accelerator or integrated Coral System-on-Module) – A dedicated hardware accelerator designed to run TensorFlow Lite models at high speed and low power. This significantly boosts the inference performance of YOLOv8 on the ESP32-CAM, which otherwise would be too slow for real-time video analysis.
- Power Supply: A stable power source for the ESP32-CAM and Edge TPU, potentially with Power over Ethernet (PoE) for easier deployment or battery backup for resilience.
- Network Connectivity: Built-in Wi-Fi on the ESP32-CAM for connecting to the internet and transmitting data to Google Cloud IoT Core.
- Enclosure: A weatherproof and vandal-resistant enclosure, suitable for outdoor or high-traffic indoor environments, to protect the electronics.
- Mounting Hardware: Brackets and fixtures for secure and optimal camera positioning to cover desired areas.
💻 Technologies Used:
- Edge Computing: Performing real-time video processing and AI inference directly on the ESP32-CAM with the Edge TPU. This minimizes latency for immediate alerts, reduces bandwidth requirements, and enhances privacy by processing video locally before sending only metadata to the cloud.
- AI Models:
- People Counting (YOLOv8): A state-of-the-art, real-time object detection algorithm known for its speed and accuracy. It will be specifically trained or fine-tuned to detect and count human instances within the camera's field of view. The output will be bounding box coordinates for each detected person.
- Clustering Algorithms: Algorithms like DBSCAN (Density-Based Spatial Clustering of Applications with Noise) or K-means will be applied to the detected human bounding box centroids.
- Density: The number of detected people within a predefined area or the closeness of clusters.
- Flow: Tracking the movement of detected individuals or clusters over consecutive frames to determine direction and speed (e.g., using object tracking algorithms in conjunction with clustering).
- Microcontroller Firmware: Programmed on the ESP32-CAM using Arduino IDE with ESP-IDF or MicroPython. This handles camera control, Edge TPU integration (via libraries), Wi-Fi connectivity, and data formatting.
- Cloud IoT Platform: Google Cloud IoT Core – A fully managed service that allows secure device connection, management, and data ingestion from a global network of devices. It provides secure communication via MQTT or HTTP protocols.
- Cloud Data Storage: Google Cloud Storage (for raw data snapshots if needed), Google BigQuery (for scalable analytics of crowd density trends), or Google Cloud Firestore/Datastore (for real-time metadata storage).
- Data Streaming & Processing: Google Cloud Pub/Sub (for real-time message ingestion) and Google Cloud Dataflow or Cloud Functions (for processing, aggregating, and analyzing incoming crowd data before storage or alerting).
- Alerting & Notification Services: Google Cloud Functions integrated with Google Cloud Pub/Sub topics to trigger alerts (e.g., sending SMS via Twilio, email via SendGrid, or notifications to a mobile app) when density thresholds are breached.
- Visualization & Dashboard: Google Data Studio, Looker, or a custom web application (using Google App Engine/Cloud Run with frameworks like React/Angular/Vue.js) – To provide real-time dashboards for public safety officials, displaying crowd maps, density heatmaps, flow arrows, and historical trends.
🌐 Use Cases of the Project
- Public Safety in Large Venues: Monitoring crowd levels in stadiums, concert halls, and convention centers to prevent overcrowding, manage emergency evacuations, and optimize entry/exit points.
- Smart City Planning: Analyzing pedestrian flow in city squares, sidewalks, and public transport hubs to inform urban planning decisions, optimize traffic lights, and deploy resources effectively.
- Retail Analytics: Understanding customer movement patterns and hot spots within shopping malls or large stores to optimize store layouts, product placement, and staffing.
- Transportation Hubs: Managing passenger flow in airports, train stations, and bus terminals to reduce bottlenecks, optimize gate/platform assignments, and improve overall passenger experience.
- Event Management: Providing real-time crowd insights for festivals, parades, and public gatherings to ensure safety, identify potential stampedes, and guide attendees.
- Emergency Response: Guiding emergency services to areas of high density during incidents or assisting in post-disaster crowd management.
- Museums and Tourist Attractions: Monitoring visitor density in different exhibits to ensure comfortable viewing, manage queues, and protect valuable artifacts.
✨ Benefits of this Project:
- Enhanced Public Safety: Proactive alerts enable rapid response to dangerous crowd conditions, preventing crushes, stampedes, and ensuring safer public spaces.
- Optimized Resource Allocation: Helps allocate security personnel, emergency services, and facility staff more efficiently to areas of high need.
- Improved Operational Efficiency: Streamlines pedestrian flow, reduces bottlenecks, and optimizes entry/exit procedures in crowded venues.
- Data-Driven Urban Planning: Provides granular data on urban movement patterns, enabling city planners to design more efficient, safer, and user-friendly public spaces.
- Real-time Situational Awareness: Provides authorities with an immediate, accurate overview of crowd dynamics, allowing for informed decision-making.
- Cost-Effectiveness: Automates monitoring tasks, reducing the need for extensive manual surveillance and associated labor costs.
- Scalability: Google Cloud's robust infrastructure allows the system to scale from monitoring a single area to an entire city.
- Reduced Bandwidth Usage: Edge processing means only metadata (counts, density, flow data) is sent to the cloud, significantly lowering bandwidth consumption compared to streaming raw video.
- Privacy-Conscious Design: By performing detection and counting at the edge, raw video feeds may not need to be transmitted or stored in the cloud, enhancing privacy (though specific implementation details are critical here).
. This project involves distinct coding efforts across an embedded system (ESP32-CAM + Edge TPU), cloud infrastructure (Google Cloud IoT Core, Pub/Sub, Cloud Functions), and AI model development.
I'll provide conceptual code outlines and snippets for the core components:
Project 5: AI-Based Crowd Density & Flow Tracker for Public Spaces Codes:
🔗 View Project Code on GitHubSteps to Implement and Run (Conceptual):
- Google Cloud Project Setup:
- Create a GCP project.
- Enable Cloud IoT Core API, Cloud Pub/Sub API, Cloud Functions API, and BigQuery API.
- Create an IoT Core Registry.
- Register a device (e.g.,
esp32cam-crowd-tracker-001) within the registry. Generate device certificates (or use a private key) and store them securely. These credentials are used by the ESP32. - Create a Pub/Sub topic (e.g.,
iot-telemetry-topic) and configure an IoT Core route to publish device telemetry to this topic. - Create another Pub/Sub topic for alerts (e.g.,
crowd-alerts-topic). - Create a BigQuery Dataset and a Table (e.g.,
crowd_data) with schema matching the data you'll insert (device_id, timestamp, people_count, density_score, raw_payload).
- ESP32-CAM Firmware:
- Set up your Arduino IDE for ESP32 and ESP32-CAM.
- Crucially, obtain and embed your actual Google Cloud IoT Core device certificates and private key (and root CA) into the Arduino sketch. Also, update
project_id,region,registry_id,device_id, andmqtt_client_idwith your specific values. - Flash the sketch to your ESP32-CAM.
- YOLOv8 & Edge TPU:
- This is a significant step: You need to train or obtain a pre-trained YOLOv8 model (specifically for people detection).
- Convert the YOLOv8 model to TensorFlow Lite format.
- Quantize the TFLite model for optimal performance on the Edge TPU.
- Integrate the TFLite model inference logic into your ESP32-CAM code. This typically involves using the TensorFlow Lite Micro library if directly on ESP32, or a dedicated library if a Coral module is attached. This part is highly hardware-specific and complex.
- Google Cloud Function Deployment:
- Deploy the Python Cloud Function (
process_crowd_data) in your GCP project. - Configure its trigger to be the Pub/Sub topic (
iot-telemetry-topic) that receives messages from IoT Core. - Set environment variables in the Cloud Function for
BIGQUERY_DATASET_ID,BIGQUERY_TABLE_ID,ALERT_PUB_SUB_TOPIC,DENSITY_ALERT_THRESHOLD,PEOPLE_COUNT_ALERT_THRESHOLD, andGCP_PROJECT. - Ensure the Cloud Function's service account has permissions to write to BigQuery, publish to Pub/Sub, and potentially send notifications.
- Deploy the Python Cloud Function (
- Dashboard:
- Use Google Data Studio or Looker to connect to your BigQuery table and visualize the crowd data. You can create charts for counts over time, density heatmaps (if you process location data more granularly), etc.
- For a custom web dashboard, use Google App Engine or Cloud Run and connect it to BigQuery or Firestore to display real-time insights.
This detailed conceptual code provides a strong foundation for developing your AI-Based Crowd Density & Flow Tracker. Remember to prioritize privacy considerations by processing sensitive video data on the edge and only sending anonymized metadata to the cloud.
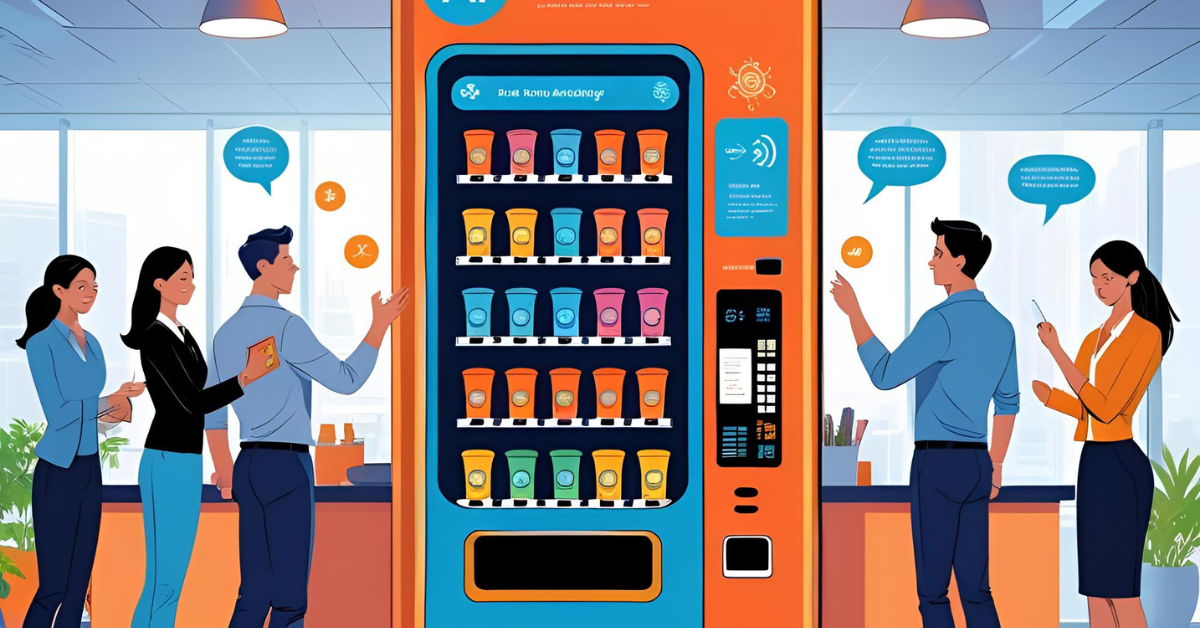
6. AI-Integrated Smart Vending Machine
💡 Objective:
To revolutionize the vending machine experience by making it intelligent and adaptive. This system aims to detect user sentiment to offer personalized product recommendations and continuously monitor inventory levels using AI. The ultimate goal is to dynamically adjust product offerings and optimize restocking processes, leading to increased sales, reduced waste, and a more engaging customer interaction.
🚀 Project Overview:
Traditional vending machines are static, offering the same products regardless of customer preference or real-time demand. This project proposes an innovative "smart" vending machine that leverages AI to create a highly responsive and profitable retail point. At its core, a Raspberry Pi acts as the central control unit, equipped with a webcam to capture user interactions. Onboard AI models, optimized for edge deployment with TensorFlow Lite, perform two key functions:
- Sentiment Analysis: Analyzes facial expressions of users approaching the machine to infer their current mood (e.g., happy, neutral, frustrated).
- Image Recognition: Periodically scans the internal inventory to detect stock levels of various products.
Based on the detected sentiment, the machine can dynamically adjust its display, promotional messages, or even offer tailored product suggestions (e.g., "Feeling down? Grab a refreshing drink!"). Simultaneously, the inventory recognition ensures that the machine always knows what's available, can auto-report low stock, prevent sales of empty slots, and even suggest optimal restocking based on demand patterns. Servo motors are integrated to manage the dispensing mechanism. All collected data – sentiment trends, inventory changes, sales logs – can be pushed to a cloud platform for analytics, enabling optimized restocking schedules and highly personalized user experiences.
🎛️ Components:
- Edge Computing Device: Raspberry Pi (e.g., Raspberry Pi 4 Model B) – The brain of the vending machine. It runs the Linux operating system, processes camera feeds, executes AI models, manages the user interface, and controls the dispensing mechanism.
- Camera Module: Webcam (e.g., USB Webcam, or Raspberry Pi Camera Module) – Positioned to capture the user's face for sentiment analysis and/or internal view for inventory recognition.
- Display Screen (Optional but Recommended): An LCD or touchscreen display to show product options, promotions, and personalized messages.
- Actuators: Servo Motors (or stepper motors) – Connected to the Raspberry Pi, these motors control the dispensing mechanism, pushing or rotating to release selected products. The number and type depend on the vending machine's design.
- Sensors (Optional):
- Proximity Sensor: To detect when a user is approaching, triggering the sentiment analysis.
- Weight/IR Sensors: Inside product slots for more accurate inventory tracking (alternative or supplement to image recognition).
- Power Supply: A robust power supply for the Raspberry Pi, webcam, servos, and any other peripherals.
- Network Connectivity: Built-in Wi-Fi or Ethernet on the Raspberry Pi for cloud communication and remote management.
- Chassis: A standard vending machine chassis or a custom-built enclosure to house all components and dispense products.
- Payment Module (Optional): Card reader, coin/bill acceptor for transaction processing.
💻 Technologies Used:
- Edge Computing: All real-time AI inference (sentiment analysis, image recognition) is performed directly on the Raspberry Pi. This ensures low latency for responsive user interaction, reduces bandwidth needs, and maintains privacy by processing visual data locally.
- AI Models:
- Sentiment Analysis: A lightweight deep learning model (e.g., CNN-based for facial emotion recognition) trained to classify facial expressions (happy, sad, neutral, angry, surprised, etc.). This model would be optimized for TensorFlow Lite to run efficiently on the Raspberry Pi.
- Image Recognition (for Inventory): Another TensorFlow Lite-optimized CNN model, trained to identify specific products within the vending machine's internal view and estimate their quantity. This could involve object detection (like a slimmed-down YOLO or SSD MobileNet) or image classification for each slot.
- AI Framework: TensorFlow Lite – The lightweight version of TensorFlow designed for mobile and embedded devices. It enables the deployment of trained AI models directly onto the Raspberry Pi for fast, on-device inference.
- Computer Vision Library: OpenCV (Open Source Computer Vision Library) – Used for capturing video streams from the webcam, pre-processing images (resizing, cropping faces/inventory areas), and potentially drawing overlays for debugging.
- Programming Language: Python – The primary language for orchestrating the entire system on the Raspberry Pi, integrating with camera, AI models, display, and servo control.
- Database (Local/Cloud):
- Local (SQLite): For temporary storage of inventory data, sales logs, and sentiment trends on the Raspberry Pi before syncing to the cloud.
- Cloud (e.g., Firebase, Azure Cosmos DB, Google Cloud Firestore): For centralized storage of aggregated sentiment data, real-time inventory levels across multiple machines, sales analytics, and remote machine management.
- Cloud Services (Optional): Azure IoT Hub/Google Cloud IoT Core (for secure device connectivity), Azure Functions/Google Cloud Functions (for backend logic like alert generation, data aggregation, restocking predictions), and Power BI/Google Data Studio (for dashboarding).
🌐 Use Cases of the Project:
- Personalized Product Recommendations: Offering specific drinks or snacks based on detected user sentiment or historical purchasing patterns.
- Dynamic Pricing: Adjusting prices of products based on demand, time of day, or remaining inventory levels.
- Optimized Restocking: Automatic alerts for low stock on popular items, predicting optimal restocking times based on real-time sales and demand fluctuations, reducing manual checks.
- Waste Reduction: Preventing the sale of expired items by knowing exact inventory counts and prioritizing items nearing expiry.
- Targeted Advertising: Displaying advertisements for products that align with detected user sentiment or demographic inferences.
- Queue Management: In high-traffic areas, monitoring sentiment could indicate frustration, prompting quicker service or alternative options.
- Sales Analytics: Detailed insights into popular products, peak sales times, and the impact of promotions or sentiment-based recommendations.
- Corporate Cafeterias/Break Rooms: Understanding employee preferences and ensuring a well-stocked and appealing selection.
✨ Benefits of this Project:
- Enhanced User Experience: Personalized recommendations and responsive interaction make vending machines more engaging and customer-friendly.
- Increased Sales & Revenue: Dynamic offerings, optimized inventory, and targeted promotions can boost impulse purchases and overall sales.
- Reduced Operational Costs: Automates inventory management, minimizes manual stock checks, and optimizes delivery routes for restocking, saving labor and logistics costs.
- Minimized Waste: Reduces spoilage by optimizing inventory levels and ensuring faster turnover of perishable goods.
- Data-Driven Insights: Provides rich data on customer behavior, product popularity, and machine performance, enabling smarter business decisions.
- Improved Efficiency: Ensures machines are always stocked with desired products, leading to fewer "out of stock" disappointments for customers.
- Competitive Advantage: Offers a unique and futuristic vending experience that stands out from traditional machines.
- Proactive Maintenance: Monitoring inventory can also reveal issues with dispensing mechanisms if products aren't moving as expected.
- Adaptability: The AI model can be continuously updated and refined based on new data, improving its accuracy and recommendation capabilities over time.
I will provide conceptual Python code snippets that illustrate the core AI and hardware interaction logic that would run on the Raspberry Pi. This focuses on the AI inference with TensorFlow Lite, basic camera capture, and conceptual servo control/cloud communication.
Prerequisites (Conceptual on Raspberry Pi):
- Raspberry Pi OS (or a similar Linux distribution)
- Python 3.x
- OpenCV (
pip install opencv-python) - TensorFlow Lite Runtime (
pip install tensorflow-liteortflite-runtimefor ARM devices) - NumPy (
pip install numpy) RPi.GPIOlibrary for GPIO control (pip install RPi.GPIO)firebase-admin(if using Firebase for cloud)- Pre-trained
.tflitemodels for Sentiment Analysis and Inventory Recognition.
Project 6: AI-Integrated Smart Vending Machine Codes:
🔗 View Project Code on GitHubSteps to Implement and Run (Conceptual):
- Firebase Project Setup:
- Go to the Firebase Console, create a new project.
- Enable Realtime Database.
- Go to Project Settings -> Service Accounts -> Generate new private key. Download
serviceAccountKey.jsonand place it on your Raspberry Pi. - Set up Firebase Realtime Database rules (e.g., for
salesandinventorynodes).
- Raspberry Pi Setup:
- Install Raspberry Pi OS.
- Install Python, OpenCV, TensorFlow Lite Runtime, NumPy, RPi.GPIO, and
firebase-admin. - Connect your webcam to the Raspberry Pi.
- Wire a servo motor to a GPIO pin (e.g., GPIO 17 as per the code).
- Transfer
vending_machine_main.py,serviceAccountKey.json, and your trained.tflitemodels to the Pi.
- AI Model Development & Conversion:
- This is the most significant effort outside of this code. You need to:
- Gather data: Facial images labeled with emotions for sentiment, and images of your vending machine's product slots with labels for each product and quantity.
- Train models: Use TensorFlow/Keras to train a CNN for sentiment analysis and an object detection model (like MobileNet-SSD or a lightweight YOLO variant) for inventory.
- Convert to TensorFlow Lite: Use
tf.lite.TFLiteConverterto convert your trained Keras models into optimized.tflitefiles suitable for the Raspberry Pi.
- This is the most significant effort outside of this code. You need to:
- Run the System:
- Execute
python3 vending_machine_main.pyon your Raspberry Pi. - Interact with the camera (show your face) to see sentiment detection and recommendations.
- Press '1', '2', etc., (as per the code) to simulate product selection and see servo activation.
- Observe the Firebase console for real-time updates to sales and inventory.
- Execute
- Dashboard (Separate Effort): Develop a web or mobile dashboard that connects to your Firebase Realtime Database to visualize sales trends, current inventory, and sentiment analytics for each machine.
Important Considerations:
- Privacy: Facial recognition for sentiment analysis raises significant privacy concerns. Ensure clear signage and obtain explicit consent from users. Consider anonymizing or deleting facial images immediately after processing.
- Model Accuracy: Real-world conditions (lighting, angles, facial occlusion) can heavily impact model accuracy. Robust models require extensive and diverse training data.
- Mechanical Dispensing: The servo control here is basic. A real vending machine dispensing system would require precise engineering and calibration.
- Power Management: Ensure stable power for all components, especially the servos which can draw significant current.
- Security: Secure your Firebase credentials and ensure your Raspberry Pi is hardened against unauthorized access.
- Scalability: For multiple vending machines, the cloud backend becomes crucial for managing data from all devices centrally.

🚀 Ready to turn your passion for connected intelligence into real-world impact?
At Huebits, we don’t just teach IoT or AI — we train you to fuse them into powerful, intelligent systems that sense, learn, and act in real time.
From smart edge devices to AI-driven cloud platforms, you’ll gain hands-on experience designing end-to-end AIoT architectures — where sensors meet machine learning and systems evolve from reactive to predictive.
🧠 Whether you're a student, aspiring AIoT engineer, or future architect of smart systems, our Industry-Ready IoT (IoT) Program is your launchpad.
Master Python, Embedded C, TinyML, MQTT, REST APIs, ESP32, Raspberry Pi, TensorFlow Lite, AWS IoT, Azure AI Services, and more — all by building real-world AIoT solutions that generate insights, not just data.
🎓 Next Cohort Starts Soon!
🔗 Join now and secure your role in the AIoT revolution powering tomorrow’s ₹1 trillion+ intelligent economy.
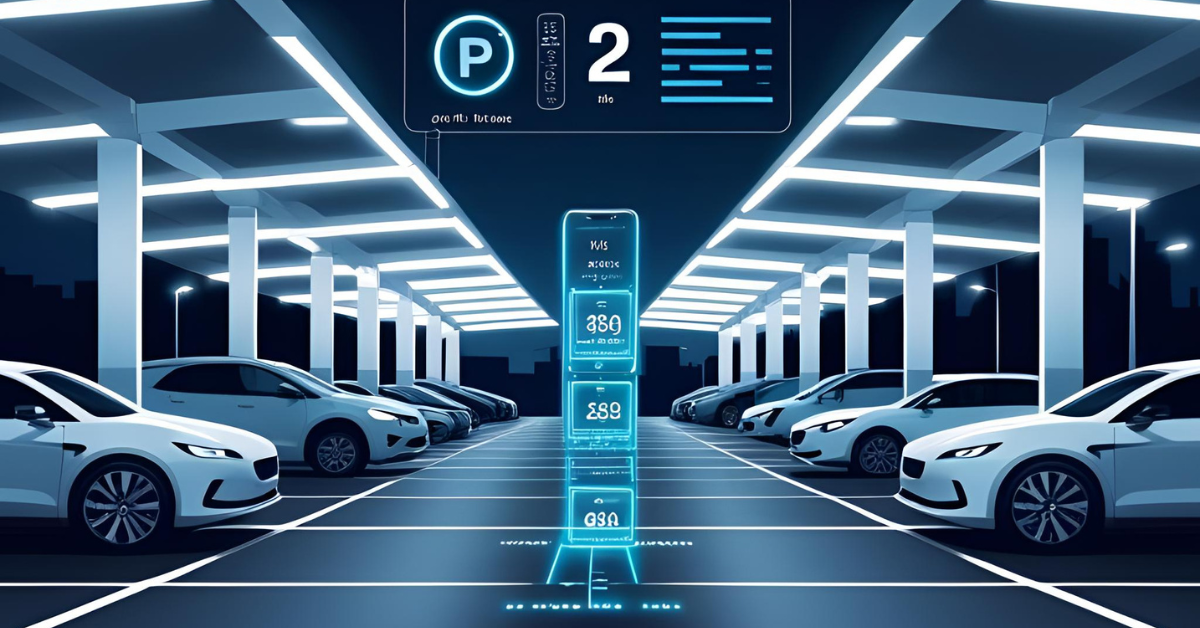
7. Intelligent Parking Management System with License Plate Recognition (LPR)
💡 Objective:
To significantly reduce urban traffic congestion and enhance the parking experience in smart cities. This system leverages AI-enabled License Plate Recognition (LPR) and sensor data to provide real-time information on parking space availability, predict parking demand, and facilitate seamless vehicle entry/exit, ultimately optimizing parking utilization and contributing to a smarter urban environment.
🚀 Project Overview:
Finding parking in bustling smart cities is a common frustration, leading to congestion, wasted fuel, and increased pollution. Current solutions often rely on static signs or manual checks. This project proposes an advanced Intelligent Parking Management System that integrates cutting-edge AI and IoT technologies. At each parking entrance/exit and for individual parking spots, a low-cost IoT node powered by a Raspberry Pi is deployed. These nodes are equipped with cameras to perform real-time License Plate Recognition (LPR) using a highly efficient AI model like YOLOv8, optimized for edge inference. Infrared (IR) sensors are placed in each parking bay to detect vehicle presence, providing a reliable backup and validation for occupancy.
When a vehicle enters, the LPR system identifies its license plate, registers its entry time, and can guide the driver to an available spot. For each spot, the IR sensor confirms occupation. This real-time occupancy data, along with LPR details, is pushed to a cloud database (Firebase). In the cloud, a predictive allocation model (e.g., Logistic Regression or more complex time-series models) analyzes historical patterns and live data to forecast parking availability and demand, allowing for dynamic pricing or routing suggestions. The system provides a centralized dashboard for operators and a mobile application for users, displaying real-time availability and guiding them to vacant spots, creating a truly seamless parking experience.
🎛️ Components:
- Edge Computing Device: Raspberry Pi (e.g., Raspberry Pi 4 Model B or Zero 2 W for individual spots) – The central processing unit at each parking entry/exit point or for managing multiple parking bays. It captures camera feeds, runs AI models for LPR, reads sensor data, and communicates with the cloud.
- Camera Module: Raspberry Pi Camera Module (e.g., v2 or HQ Camera) or a compatible USB Webcam – Positioned at entry/exit points for LPR and potentially above individual parking spots for visual confirmation of occupancy.
- Presence Sensors: IR Sensors (Infrared Proximity Sensors) – Mounted at each parking bay to accurately detect if a vehicle is present or not. Ultrasonic sensors or inductive loops are alternatives.
- Storage: High-speed MicroSD Card (for Raspberry Pi OS, models, and temporary data).
- Network Connectivity: Built-in Wi-Fi or Ethernet on the Raspberry Pi for secure and reliable data transmission to Firebase.
- Power Supply: A stable, continuous power supply for the Raspberry Pi and connected sensors/camera.
- Gate/Barrier Control (Optional): If automated entry/exit is desired, includes:
- Relay Module: To control the motor for the parking barrier.
- Stepper/DC Motor: For lifting/lowering the barrier.
- Display/Indicators (Optional): Small LEDs or an LCD screen to indicate spot availability or direct drivers.
💻 Technologies Used:
- Edge Computing: Performing LPR and initial data processing directly on the Raspberry Pi. This reduces latency for quick gate operations, minimizes bandwidth by sending only metadata (license plate, timestamp, spot status) to the cloud, and enhances privacy by not streaming raw video.
- AI Models:
- License Plate Recognition (LPR):
- Object Detection (YOLOv8): A state-of-the-art object detection model, fine-tuned to precisely locate and bound license plates within an image. Optimized for TensorFlow Lite or OpenVINO for efficient edge inference.
- Optical Character Recognition (OCR): After a license plate is detected, a secondary model or library (e.g., EasyOCR, custom CNN, or specialized Tesseract for embedded) extracts the alphanumeric characters from the cropped license plate image.
- Predictive Allocation (Logistic Regression): A machine learning model (can be trained with
scikit-learnin Python) used in the cloud (or edge for simpler predictions) to:- Predict the likelihood of a parking spot being occupied or vacated based on time of day, day of week, historical usage, and current events.
- Estimate parking duration to better manage expected availability.
- License Plate Recognition (LPR):
- AI Framework: TensorFlow Lite – Used for deploying the optimized YOLOv8 and potentially the OCR models to the Raspberry Pi for high-performance edge inference.
- Computer Vision Library: OpenCV (Open Source Computer Vision Library) – Essential for camera interfacing, image manipulation (cropping, resizing), and potentially pre/post-processing for AI models.
- Programming Language: Python – The primary language for developing the edge application on the Raspberry Pi, integrating camera, sensors, AI models, and cloud communication.
- Cloud Database: Firebase Realtime Database / Cloud Firestore – A NoSQL cloud database from Google that offers real-time synchronization, making it ideal for storing parking spot statuses, LPR logs, and managing user data. Its ease of integration with Python and web/mobile apps is a significant advantage.
- Cloud Functions (Optional): Firebase Cloud Functions or Google Cloud Functions – For backend logic such as:
- Triggering alerts when parking lot is full.
- Aggregating historical parking data.
- Running the predictive allocation model periodically.
- Managing user accounts and payment integration.
- User Interface/Dashboard:
- Web Application (Firebase Hosting, React/Angular/Vue.js): For a management dashboard to view real-time occupancy, LPR logs, and analytics.
- Mobile Application (Flutter/React Native): For end-users to find available parking spots, navigate, and potentially handle payments.
🌐 Use Cases of the Project:
- Smart City Parking: Guiding drivers to available parking spots in multi-story car parks, street parking, and public lots.
- Commercial Parking Garages: Automating entry/exit, calculating parking fees based on LPR, and managing VIP/subscription parking.
- Residential Complexes: Monitoring unauthorized parking, managing visitor parking, and ensuring residents have dedicated spots.
- Shopping Malls & Retail Centers: Enhancing customer experience by quickly directing them to vacant spots, especially during peak hours.
- Event Venues: Efficiently managing large influxes of vehicles, pre-booking parking, and optimizing traffic flow around the venue.
- Fleet Management: Tracking company vehicles, monitoring their parking patterns, and ensuring compliance.
- Law Enforcement & Security: Identifying suspicious vehicles (if integrated with databases, with proper legal frameworks).
✨ Benefits of this Project:
- Reduced Congestion: Drivers spend less time searching for parking, easing traffic flow and reducing "cruising for parking."
- Enhanced User Experience: Seamless entry/exit, real-time guidance to available spots, and potential for pre-booking improve driver satisfaction.
- Optimized Space Utilization: Real-time data allows for better management of parking capacity, potentially enabling dynamic pricing strategies.
- Increased Revenue (for operators): Efficient turnover of spots and data-driven pricing can boost profitability.
- Environmental Benefits: Reduced idling time for vehicles leads to lower fuel consumption and decreased carbon emissions.
- Improved Safety & Security: LPR provides a log of vehicles entering/exiting, enhancing security and aiding in case of incidents.
- Data-Driven Decision Making: Comprehensive data on parking trends helps urban planners and parking operators make informed decisions about infrastructure development and policy.
- Cost-Effective: Utilizing Raspberry Pi and efficient AI models reduces hardware costs compared to proprietary, closed systems.
- Scalability: The modular design (per-spot or per-entry node) and cloud backend allow for easy scaling from small lots to entire city-wide parking networks.
I'll provide conceptual Python code snippets focusing on the core functionalities that would run on the Raspberry Pi, integrating camera input, IR sensor readings, placeholder AI inference for LPR/OCR, and Firebase communication.
Prerequisites (on Raspberry Pi):
- Raspberry Pi OS
- Python 3.x
- OpenCV (
pip install opencv-python) - TensorFlow Lite Runtime (
pip install tflite-runtime- specifically for ARM/Raspberry Pi) - NumPy (
pip install numpy) - RPi.GPIO (
pip install RPi.GPIO) firebase-admin(pip install firebase-admin)- Pre-trained
.tflitemodels:- A YOLOv8-like model for License Plate Detection (converted to
.tflite). - An OCR model for character recognition (could be a custom
.tflitemodel or a library like EasyOCR if performance allows).
- A YOLOv8-like model for License Plate Detection (converted to
- Firebase Service Account Key:
serviceAccountKey.jsondownloaded from your Firebase project. - Hardware Setup: Raspberry Pi, Camera Module, IR Sensor(s) wired to GPIO pins, optionally a relay for a barrier.
Project 7: Intelligent Parking Management System with License Plate Recognition (LPR) Codes:
🔗 View Project Code on GitHubSteps to Implement and Run (Conceptual):
- Firebase Project Setup:
- Create a Google Firebase project.
- Enable Realtime Database or Cloud Firestore.
- Generate a Service Account Key (
serviceAccountKey.json) from Project settings -> Service accounts. Download this file. - Set up database rules for read/write access.
- Raspberry Pi Setup:
- Install Raspberry Pi OS.
- Install necessary Python libraries (
opencv-python,tflite-runtime,numpy,RPi.GPIO,firebase-admin). - Connect your Camera Module and IR sensor(s) to the appropriate GPIO pins.
- Place your
serviceAccountKey.jsonand the trained.tflitemodels (yolov8_lpr_detection.tflite,lpr_ocr.tflite) in the correct paths on your Raspberry Pi. - Update the
firebase_admin.initialize_appdatabase URL andNODE_IDin the Python script.
- AI Model Development & Conversion:
- Crucial Step: Train your YOLOv8 model for LPR using a custom dataset of license plates. Then, train a separate OCR model (e.g., a CNN or use a library like EasyOCR fine-tuned for license plates).
- Convert both trained models to TensorFlow Lite format (
.tflite) and optimize them for edge deployment. This involves tools provided by TensorFlow.
- Running the System:
- Execute
python3 parking_node_main.pyon your Raspberry Pi. - Observe the console output for detected plates and sensor status.
- Check your Firebase console to see real-time updates to parking spot statuses and event logs.
- Execute
- Predictive Allocation Model (Cloud-based):
- Collect historical data from your Firebase database (LPR logs, entry/exit times, spot occupancy).
- Train a Logistic Regression (or more advanced time-series forecasting model) using this data in a cloud environment (e.g., a Google Cloud Function, Dataflow, or a Jupyter notebook in Vertex AI Workbench).
- Deploy this model (e.g., as a Cloud Function triggered periodically) to update the
predictive_allocationnode in Firebase.
- User Interface/Dashboard (Separate Development):
- Build a web application (e.g., using React/Angular/Vue.js) or a mobile app that connects directly to your Firebase Realtime Database to display parking availability, LPR logs, and predictive insights.
Important Legal & Ethical Considerations for LPR:
- Privacy: LPR systems collect personally identifiable information (license plates). Ensure compliance with local data privacy laws (e.g., GDPR, India's DPDP Act). Implement strong data encryption, retention policies, and access controls.
- Transparency: Clearly inform individuals that LPR is in use with prominent signage.
- Purpose Limitation: Use collected data only for the stated purpose of parking management, not for unauthorized surveillance or tracking.
- Security: Protect the entire system from cyber threats, unauthorized access, and data breaches.
This conceptual framework provides a robust starting point for building your intelligent parking management system.
8. AI-Powered Personalized HVAC System
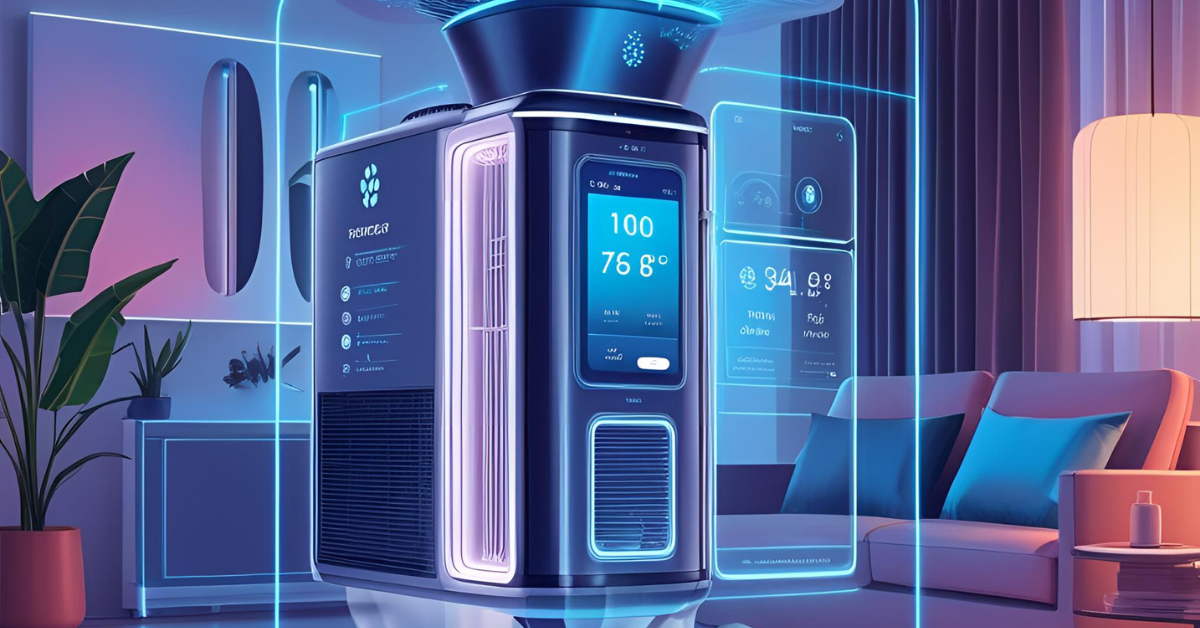
💡 Objective:
To provide an optimal indoor environment by intelligently adjusting heating, ventilation, and air conditioning (HVAC) based on real-time occupancy, user activity patterns, and individual preferences. This system aims to deliver enhanced comfort, superior indoor air quality, and significant energy savings by minimizing wasteful heating/cooling of unoccupied or sub-optimally conditioned spaces.
🚀 Project Overview:
Traditional HVAC systems often operate on fixed schedules or simple thermostat settings, leading to energy waste and inconsistent comfort levels. This project proposes an advanced, AI-powered HVAC system that adapts dynamically to the unique needs of a space and its occupants. At its core, an ESP32 microcontroller serves as the edge device, equipped with multiple environmental sensors, including temperature, humidity, and CO2 sensors, to continuously monitor the indoor climate and air quality. Crucially, the system goes beyond simple rule-based automation by incorporating AI models.
Data from these sensors, along with user-defined preferences and potentially occupancy data (e.g., from passive infrared or millimetre-wave radar sensors for privacy-preserving occupancy detection), is streamed to Azure IoT Hub. In the cloud, a sophisticated Time-Series Forecasting model predicts future temperature and air quality needs based on historical data, weather forecasts, and detected occupancy patterns. Complementing this, a Reinforcement Learning (RL) model continuously learns optimal HVAC control strategies, fine-tuning settings (e.g., fan speed, temperature setpoints, fresh air intake) to maximize comfort while minimizing energy consumption. The RL agent receives "rewards" for achieving comfort and "penalties" for energy waste or discomfort. The learned optimal policies are then sent back to the ESP32, which directly controls the HVAC unit (via relays or an API). This creates a truly intelligent system that not only reacts but proactively anticipates and optimizes the indoor environment, leading to significant energy savings and unparalleled personalized comfort.
🎛️ Components:
- Edge Computing Device: ESP32 Microcontroller – A powerful, Wi-Fi-enabled microcontroller that acts as the brain of the indoor unit. It interfaces with sensors, processes data locally, runs lightweight control logic, and communicates securely with Azure IoT Hub.
- Environmental Sensors:
- Temperature & Humidity Sensor: (e.g., DHT11/DHT22, BME280) – To accurately measure ambient room temperature and relative humidity.
- CO2 Sensor: (e.g., MH-Z19B, SCD30) – To monitor indoor air quality and detect elevated carbon dioxide levels, indicating a need for ventilation.
- VOC (Volatile Organic Compound) Sensor (Optional): (e.g., CCS811, BME680) – For more comprehensive air quality monitoring.
- Occupancy Sensor (Optional but Recommended):
- PIR (Passive Infrared) Sensor: For simple presence detection (basic).
- Millimetre-Wave Radar Sensor (e.g., LD2410B): For more accurate and privacy-preserving occupancy and even activity detection (e.g., sitting vs. walking), as it doesn't use cameras.
- HVAC Control Interface:
- Relay Module: To switch HVAC unit functions (e.g., Fan ON/OFF, Compressor ON/OFF, Heat/Cool modes) based on ESP32 commands.
- IR Emitter Module: To control mini-split AC units via their infrared remote control signals.
- Modbus/BACnet/API Gateway: For integration with commercial/smart HVAC systems that offer digital control interfaces.
- User Interface/Input (Optional):
- Push Buttons/Rotary Encoder: For local manual overrides or preference setting.
- Small LCD Display: To show current readings or status.
- Power Supply: A stable 5V DC power supply for the ESP32 and sensors.
- Enclosure: A compact and aesthetically pleasing enclosure for the indoor unit.
💻 Technologies Used:
- Edge Computing: The ESP32 handles sensor data acquisition, basic data filtering, and execution of control commands received from the cloud, ensuring low latency for immediate environmental adjustments.
- IoT Platform: Azure IoT Hub – A fully managed cloud service that enables highly secure and reliable bidirectional communication between the IoT devices (ESP32s) and the cloud solution. It supports MQTT, AMQP, and HTTP protocols.
- AI Models:
- Time-Series Forecasting: (e.g., ARIMA, Prophet, or LSTM Neural Networks) – Implemented in the cloud (e.g., Azure Machine Learning, Azure Databricks). This model predicts future temperature, humidity, and CO2 levels based on historical sensor data, external weather forecasts (integrated via APIs), and learned occupancy patterns.
- Reinforcement Learning (RL): (e.g., Q-learning, Deep Q-Networks - DQN, or DDPG) – Implemented in the cloud. The RL agent learns an optimal "policy" for controlling HVAC parameters by interacting with a simulated environment or directly with the real system (with careful exploration strategies). It receives rewards for maintaining comfort (e.g., temperature within a preferred range, good air quality) and penalties for excessive energy consumption or discomfort.
- Cloud Data Storage: Azure Cosmos DB (for real-time telemetry and device twins) or Azure Data Lake Storage / Azure SQL Database (for historical sensor data and model training data).
- Data Processing & Analytics: Azure Stream Analytics (for real-time processing of incoming sensor data), Azure Functions (for serverless backend logic, triggering model inferences, sending commands back to devices), Azure Databricks / Azure Machine Learning (for training, deploying, and managing the AI models).
- Telemetry & Command Protocols: MQTT (Message Queuing Telemetry Transport) – A lightweight messaging protocol ideal for IoT devices like the ESP32 to send sensor data to Azure IoT Hub and receive commands.
- Programming Languages:
- C++/Arduino Framework (for ESP32): For efficient, low-level sensor reading and communication.
- Python: For cloud-side AI model training, data processing, and backend logic (e.g., with Azure Functions).
- User Interface/Dashboard (Optional): Azure Power BI or a custom web application (e.g., hosted on Azure App Service) – To visualize current environmental conditions, HVAC status, energy consumption trends, and allow users to set preferences or overrides.
🌐 Use Cases of the Project:
- Smart Homes: Automatically adjusting climate based on family presence, sleep schedules, and individual room preferences.
- Smart Offices/Commercial Buildings: Optimizing energy use by conditioning only occupied zones, adjusting ventilation based on CO2 levels in meeting rooms, and offering personalized climate zones for employees.
- Hotels/Hospitality: Ensuring guest comfort upon arrival, automatically adjusting temperature when rooms are unoccupied, and providing personalized settings.
- Educational Institutions: Maintaining optimal learning environments by managing temperature and CO2 levels in classrooms, leading to improved student concentration and health.
- Healthcare Facilities: Ensuring precise climate control in patient rooms, operating theaters, and sensitive equipment areas, while also managing air quality for health.
- Data Centers: Maintaining ideal temperature and humidity for equipment (though often stricter, less personalized controls).
✨ Benefits of this Project:
- Significant Energy Savings: Up to 35% reduction in energy consumption by intelligently avoiding heating/cooling unoccupied spaces or over-conditioning.
- Maximized Comfort: Proactive and personalized climate control ensures optimal temperature, humidity, and air quality for occupants.
- Improved Indoor Air Quality (IAQ): Continuous CO2 monitoring ensures adequate ventilation, leading to healthier and more productive environments.
- Reduced Carbon Footprint: Lower energy consumption directly translates to a smaller environmental impact.
- Data-Driven Optimization: Rich sensor data provides insights into building performance, energy usage patterns, and occupant behavior, enabling continuous improvement.
- Scalability: The cloud-based architecture allows the system to manage HVAC for a single room to an entire building or even a campus.
- Adaptability: The Reinforcement Learning model continuously learns and adapts to changing external weather conditions, internal occupancy patterns, and user preferences over time, improving its performance.
- Reduced HVAC Wear and Tear: Optimized operation can potentially extend the lifespan of HVAC equipment by reducing unnecessary cycling.
- Enhanced Occupant Well-being: A consistently comfortable and healthy indoor environment contributes to better mood, reduced stress, and improved cognitive function.
Project 8: AI-Powered Personalized HVAC System Codes:
🔗 View Project Code on GitHubI will provide conceptual code snippets for the two primary components:
- ESP32 Firmware (Arduino C++): This code handles sensor reading, publishing telemetry to Azure IoT Hub, and receiving commands to control the HVAC.
- Azure Function (Python): This function conceptually receives telemetry, triggers an AI decision (represented as a placeholder), and sends a command back to the ESP32.
Prerequisites (Conceptual):
- ESP32 Development Environment: Arduino IDE with ESP32 board support, or PlatformIO.
- Libraries for ESP32:
WiFiClientSecure(for secure MQTT over TLS)PubSubClient(for MQTT protocol)- Sensor-specific libraries (e.g.,
DHT sensor library,Adafruit Unified Sensor,Adafruit_BME280,MHZ19_UART) - Azure IoT Hub connection libraries/helpers (often custom or derived from
PubSubClient).
- Azure Account & Setup:
- An Azure Subscription.
- Azure IoT Hub: An IoT Hub instance created in your resource group.
- IoT Hub Device: A device registered within your IoT Hub, with its connection string.
- Azure Function App: A Function App created.
- Azure Cosmos DB / Storage Account: For data storage (telemetry, model data).
- Azure Machine Learning Workspace: For training and deploying Time-Series Forecasting and Reinforcement Learning models (these are external to the function's direct code).
- Python Environment (for Azure Function):
azure-iot-hubSDKjsondatetime
Steps to Implement and Run (Conceptual):
- Azure Setup:
- Create an Azure IoT Hub.
- Register a new device (e.g.,
myESP32Device) in your IoT Hub. Copy its Device Connection String (for the ESP32) and the IoT Hub Owner Shared Access Policy Connection String (for the Azure Function). - Set up an IoT Hub Message Route to send device telemetry to an Event Hub endpoint.
- Create an Azure Function App and a new Event Hub Trigger function within it. Configure the Event Hub connection string to point to the Event Hub endpoint associated with your IoT Hub route.
- In the Azure Function App's configuration, add an Application Setting named
IoTHubOwnerConnectionStringand paste your IoT Hub owner connection string as its value.
- ESP32 Firmware:
- Install necessary libraries in your Arduino IDE or PlatformIO.
- Crucially, replace placeholders:
YOUR_WIFI_SSID,YOUR_WIFI_PASSWORD,YOUR_IOT_HUB_NAME.azure-devices.net,myESP32Device, and especiallysasToken(you'll need to generate a SAS token for your device, or use the device's primary key directly if your PubSubClient allows it, which is less secure). Ensure theazureRootCais correct for your region. - Wire your DHT, CO2, Occupancy sensors, and HVAC control relays to the specified ESP32 pins.
- Upload the code to your ESP32.
- Cloud AI Model Development (Separate & Complex):
- Time-Series Forecasting: Collect historical sensor data. Use Azure Machine Learning, Azure Databricks, or a custom Python script to train models (ARIMA, LSTM, Prophet) that predict future temperature, humidity, and CO2.
- Reinforcement Learning: This is the most complex part. You'd build an RL environment (a simulation of your room/HVAC) and train an RL agent (e.g., using frameworks like Ray RLlib or stable-baselines3) to learn optimal HVAC control policies based on comfort (rewards) and energy consumption (penalties).
- Deploy these trained models as Azure Machine Learning Endpoints (REST APIs) that your Azure Function can call.
- Azure Function (Python):
- Deploy the Python code to your Azure Function.
- The current simplified AI logic will run. For real AI, you would modify the
SIMPLIFIED AI DECISIONsection to make HTTP requests to your Azure ML endpoints, sending current telemetry and receiving optimal HVAC settings.
- Monitoring & Dashboard:
- Use Azure Monitor to observe telemetry flowing through IoT Hub.
- For a dashboard, you can connect Azure Power BI directly to your data storage (e.g., Azure Cosmos DB) to visualize real-time conditions, HVAC status, and energy usage.
This detailed conceptual code provides a strong foundation for building your AI-Powered Personalized HVAC System. Remember that the sophistication of the AI models and the robustness of the hardware integration will define the system's true performance.

🚀 Ready to turn your passion for connected intelligence into real-world impact?
At Huebits, we don’t just teach IoT or AI — we train you to fuse them into powerful, intelligent systems that sense, learn, and act in real time.
From smart edge devices to AI-driven cloud platforms, you’ll gain hands-on experience designing end-to-end AIoT architectures — where sensors meet machine learning and systems evolve from reactive to predictive.
🧠 Whether you're a student, aspiring AIoT engineer, or future architect of smart systems, our Industry-Ready IoT (IoT) Program is your launchpad.
Master Python, Embedded C, TinyML, MQTT, REST APIs, ESP32, Raspberry Pi, TensorFlow Lite, AWS IoT, Azure AI Services, and more — all by building real-world AIoT solutions that generate insights, not just data.
🎓 Next Cohort Starts Soon!
🔗 Join now and secure your role in the AIoT revolution powering tomorrow’s ₹1 trillion+ intelligent economy.
9. Real-Time Wildlife Monitoring System with AI Detection
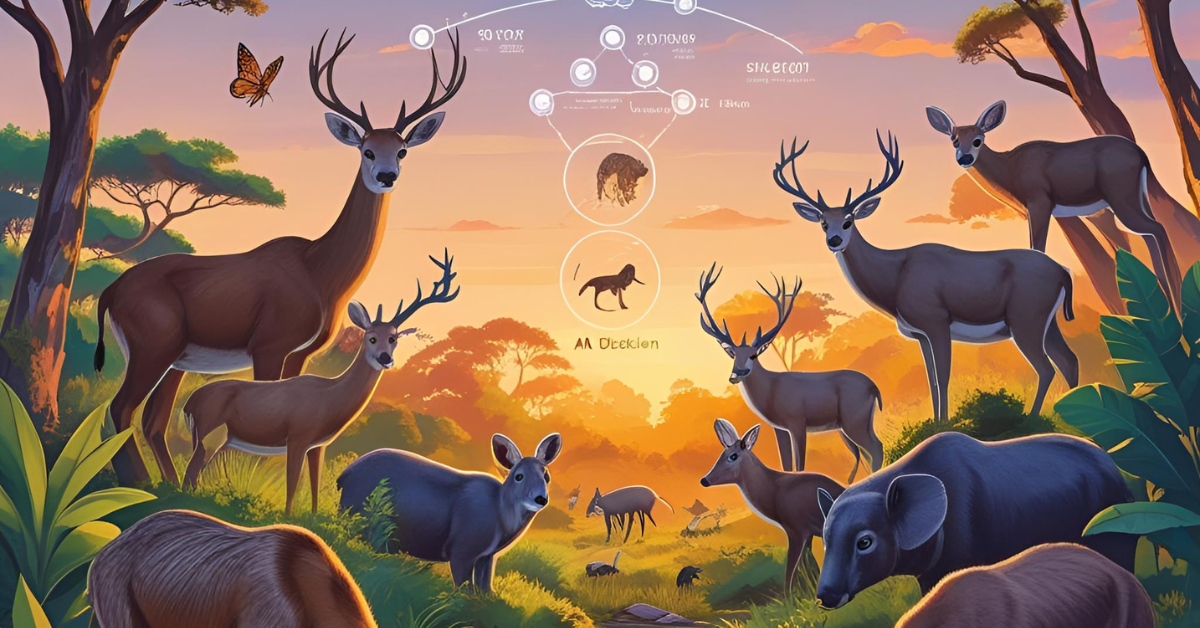
💡 Objective
To establish a non-invasive, efficient, and cost-effective system for real-time monitoring of wildlife, particularly rare or endangered species, and to detect human intrusions in remote forest environments. The system aims to provide conservation-grade data for ecological research, anti-poaching efforts, and wildlife management, minimizing human disturbance to sensitive ecosystems.
🚀 Project Overview
Traditional wildlife monitoring often relies on labor-intensive field surveys, less efficient standard camera traps that require manual data retrieval, or expensive satellite collars. This project introduces an innovative "Smart Camera Trap" system leveraging AI and long-range wireless communication for real-time, autonomous monitoring. At its core, an ultra-low-power ESP32-CAM module, integrated with a PIR (Passive Infrared) sensor, serves as the intelligent camera trap unit. When the PIR sensor detects motion (triggered by an animal or human), the ESP32-CAM captures an image or short video clip.
Crucially, the captured image is immediately processed on the edge device itself. A lightweight, Custom Object Detection AI Model (e.g., a highly optimized YOLO or MobileNet variant, trained with Transfer Learning for specific species) runs directly on the ESP32 to identify the detected object as a specific animal species (e.g., tiger, deer, pangolin) or a human. If a target species or an intrusion is detected, the relevant metadata (species identified, timestamp, confidence score) and optionally a compressed thumbnail image are transmitted over LoRa (Long Range) wireless technology. LoRa's low power consumption and long-range capabilities make it ideal for dense forest environments where Wi-Fi or cellular networks are unavailable. LoRa gateways, strategically placed at collection points (e.g., forest ranger stations, mobile units), receive these transmissions and forward the data to the cloud (AWS S3) for permanent storage and further analysis. SD card logging on the ESP32 provides a robust backup for all captured media. This real-time, intelligent system enables rapid response to poaching, provides invaluable data for population estimates, behavioral studies, and habitat mapping, revolutionizing wildlife conservation efforts.
🎛️ Components
- Edge Computing Device: ESP32-CAM Module – A compact and low-cost ESP32 board with an integrated camera. It runs the custom AI model, controls the camera, manages the PIR sensor, and interfaces with the LoRa module. Its low power consumption is crucial for remote deployments.
- Motion Detection Sensor: PIR (Passive Infrared) Sensor – Triggers the ESP32-CAM to wake up and capture an image/video when motion (heat signature) is detected, significantly conserving power by avoiding continuous recording.
- Long-Range Communication Module: LoRa Transceiver Module (e.g., SX1276/SX1278) – Interfaced with the ESP32. Enables low-power, long-range wireless communication to a LoRa Gateway, ideal for transmitting data from remote forest locations.
- LoRa Gateway: (e.g., Dragino, RAK Wireless gateway) – A higher-power device strategically placed within range of multiple ESP32-CAM nodes. It receives LoRa data packets and forwards them to the internet (via Wi-Fi, Ethernet, or Cellular) for cloud upload.
- Storage:
- MicroSD Card: On the ESP32-CAM for local storage of all captured images/videos as a backup, ensuring no data is lost even if LoRa transmission fails.
- Power Source:
- Rechargeable LiPo Battery: For powering the ESP32-CAM and LoRa module in remote locations.
- Solar Panel + Charge Controller: Essential for sustainable, long-term deployment in the field, recharging the battery.
- Enclosure: Rugged, waterproof, and camouflage-painted enclosure to protect the electronics from weather elements and curious animals.
- Antenna: Appropriate LoRa antenna for optimal range (e.g., high-gain directional for gateways, omnidirectional for nodes).
💻 Technologies Used
- Edge Computing: The ESP32-CAM performs on-device AI inference (object detection) using a lightweight model. This minimizes the data transmitted over LoRa (sending only metadata and small thumbnails), drastically reducing power consumption and bandwidth needs in remote areas.
- AI Models:
- Custom Object Detection: A deep learning model (e.g., YOLOv8-Nano, MobileNet-SSD, or EfficientDet-Lite) specifically trained on images of target wildlife species (e.g., tigers, leopards, specific bird species) and "intrusion" (human) classifications.
- Transfer Learning: A crucial technique used to adapt a pre-trained general object detection model to the specific task of wildlife recognition with a smaller dataset, making training faster and more efficient.
- Model Optimization: Quantization and pruning techniques are applied to the trained model to reduce its size and computational requirements, allowing it to run efficiently on the resource-constrained ESP32.
- Cloud Storage: AWS S3 (Amazon Simple Storage Service) – A scalable, highly durable, and secure object storage service in the cloud. Used for storing transmitted metadata, thumbnail images, and potentially full-resolution images uploaded when the SD card is manually retrieved.
- Long-Range Wireless Communication: LoRa (Long Range) – A proprietary low-power wide-area network (LPWAN) modulation technique. It enables long-range communication (kilometers) with low data rates, making it perfect for remote forest environments where power is scarce and cellular/Wi-Fi is absent.
- Networking Protocol: LoRaWAN (LoRa Wide Area Network) – A MAC layer protocol for managing communication between LoRa end-nodes and gateways, often used in conjunction with a LoRaWAN Network Server (e.g., The Things Network, AWS IoT Core for LoRaWAN).
- Cloud Services (AWS Stack Example):
- AWS IoT Core for LoRaWAN: To securely connect LoRaWAN devices and route their data to other AWS services.
- AWS Lambda: Serverless functions to process incoming LoRa data (e.g., parse JSON, update databases, trigger alerts).
- AWS DynamoDB: A NoSQL database for storing structured metadata (timestamps, species detected, location, confidence).
- AWS SQS/SNS: For queuing messages or sending notifications (e.g., immediate alerts for poaching).
- AWS Rekognition (Optional): For advanced server-side image analysis if full-resolution images are later uploaded.
- Programming Languages:
- C++/Arduino Framework: For the ESP32 firmware development, leveraging optimized libraries for camera, sensors, LoRa, and TensorFlow Lite Micro.
- Python: For cloud-side logic (Lambda functions, data processing, backend analytics).
- AI Framework (Edge): TensorFlow Lite Micro – The ultra-lightweight version of TensorFlow designed for microcontrollers, enabling the object detection model to run directly on the ESP32.
🌐 Use Cases of the Project
- Wildlife Population Monitoring: Estimating population sizes, tracking demographics, and observing long-term trends for various species.
- Anti-Poaching Operations: Real-time alerts for human intrusions or suspicious activity in protected areas, enabling rapid ranger deployment.
- Behavioral Ecology Studies: Observing animal behavior patterns (e.g., mating, feeding, migration) without human disturbance.
- Habitat Assessment: Understanding how species utilize different parts of their habitat and identifying critical areas.
- Rare Species Detection: Confirming the presence and tracking movements of elusive or critically endangered animals.
- Human-Wildlife Conflict Mitigation: Identifying conflict hotspots by monitoring animal movements near human settlements.
- Forest Fire Detection (future expansion): Integrating thermal sensors and AI to detect early signs of fires.
- Ecotourism Management: Providing data on wildlife sightings for responsible tourism while ensuring animal welfare.
✨ Benefits of this Project
- Non-Invasive Monitoring: Reduces stress and disturbance to wildlife, crucial for studying sensitive or shy species.
- Real-Time Data & Alerts: Enables immediate response to threats (poaching, forest fires) and timely ecological insights.
- Conservation-Grade Data: Provides consistent, objective data essential for scientific research, conservation planning, and policy making.
- Cost-Effective: Leverages low-cost hardware (ESP32-CAM) and open-source AI frameworks, making large-scale deployment more feasible than traditional methods.
- Energy Efficient: PIR-triggered activation and LoRa communication drastically reduce power consumption, allowing for extended field deployments with solar recharging.
- Scalability: A network of numerous intelligent camera traps can cover vast forest areas.
- Reduced Human Effort & Risk: Minimizes the need for rangers to frequently enter dangerous or remote terrain for manual data collection.
- Adaptability: The AI model can be retrained and updated to detect new species or behaviors as conservation needs evolve.
- Enhanced Security: Provides a robust deterrent and early warning system against illegal activities in protected zones.
- Global Accessibility: Cloud-based data storage allows researchers and conservationists worldwide to access and collaborate on valuable wildlife data.
I will provide conceptual code snippets for the two primary components:
- ESP32-CAM Firmware (Arduino C++): This code handles sensor triggering, camera capture, on-device AI inference using TensorFlow Lite Micro, SD card logging, and transmitting data via LoRa.
- AWS Lambda Function (Python): This function conceptually receives data from the LoRaWAN gateway (via AWS IoT Core), processes it, and stores it in AWS DynamoDB (metadata) and AWS S3 (thumbnail images).
Prerequisites (Conceptual):
- ESP32-CAM Development Environment: Arduino IDE with ESP32 board support, or PlatformIO.
- Libraries for ESP32:
WiFi.h(for ESP32-CAM, even if not used for direct internet)esp32-camera.h(for camera control)SD_MMC.h(for SD card access)- TensorFlow Lite Micro library: (This requires specific setup for ESP32 and depends on your trained model)
- A LoRa library (e.g.,
RadioLibor specific SX127x driver library). ArduinoJson(for data serialization).
- AWS Account & Setup:
- An AWS account.
- AWS IoT Core for LoRaWAN: Setup for your LoRaWAN devices and gateways.
- AWS Lambda Function: A Python 3.x runtime function.
- AWS DynamoDB Table: For metadata storage.
- AWS S3 Bucket: For storing images.
- IAM roles/permissions for Lambda to access DynamoDB, S3, and IoT Core.
- AI Model Training & Optimization:
- A custom object detection model (YOLOv8-Nano, MobileNet-SSD, or EfficientDet-Lite) trained with a dataset of wildlife species and human intrusion.
- This model must be converted and optimized (quantized) for TensorFlow Lite Micro to run on the ESP32's limited resources.
Project 9: Real-Time Wildlife Monitoring System with AI Detection Codes:
🔗 View Project Code on GitHubSteps to Implement and Run (Conceptual):
- AWS Setup:
- Create an AWS IoT Core for LoRaWAN gateway and device.
- Set up an IoT Core Rule to route messages from your LoRaWAN device to an AWS Lambda function (this Lambda function).
- Create an AWS DynamoDB table (e.g.,
WildlifeDetectionMetadata) withdetectionIdas the primary key. - Create an AWS S3 bucket (e.g.,
your-wildlife-thumbnails-bucket) for storing images (even if only metadata is sent via LoRa, you might later retrieve full images from SD cards and upload them here). - Create an AWS SNS Topic (e.g.,
WildlifeAlerts) and subscribe your email/phone for alerts. - Create an IAM Role for your Lambda function with permissions to
iot:Publish,dynamodb:PutItem,s3:PutObject,sns:Publish, andlogs:CreateLogGroup/logs:CreateLogStream/logs:PutLogEvents. - Deploy the Python Lambda code to AWS Lambda. Configure Environment Variables for
METADATA_TABLE_NAME,ALERTS_TOPIC_ARN, andTHUMBNAIL_BUCKET_NAME.
- AI Model Training & Optimization (Crucial Separate Effort):
- Gather a large dataset of images of the wildlife species you want to detect, as well as images of humans for intrusion detection.
- Annotate these images with bounding boxes for each object.
- Train a custom object detection model (e.g., using YOLOv8 with PyTorch/TensorFlow) on your dataset.
- Convert and Optimize: Use TensorFlow Lite converter to convert your trained model to a
.tfliteformat. Then, apply quantization (e.g., post-training quantization, or quantization-aware training) to shrink the model size and make it efficient for the ESP32's capabilities. - Integrate the
.tflitemodel into your ESP32-CAM firmware using the TensorFlow Lite Micro library. This involves embedding the model data and writing code to preprocess the camera image and parse the model's output.
- ESP32-CAM Firmware:
- Wire the PIR sensor to GPIO 13.
- Integrate your LoRa module (e.g., SX127x) with the ESP32-CAM, connecting its SPI pins and DIO pins.
- Replace placeholders: Configure WiFi (even if not connecting to internet, camera libs might need it), and critically, adapt the
performAIInferenceandsendLoRaDatafunctions to use your actual TFLite Micro model and LoRa library. - Upload the firmware to your ESP32-CAM.
- Deployment:
- Place the ESP32-CAM nodes with batteries and solar panels in waterproof, camouflaged enclosures in the forest.
- Set up LoRa gateways at strategic locations (e.g., ranger stations, elevated points) within range of the nodes and with internet connectivity (Wi-Fi, Ethernet, or cellular modem) to forward data to AWS IoT Core.
- Monitoring & Alerts:
- Monitor DynamoDB for new detection metadata.
- Check your subscribed email/phone for SNS alerts when an intrusion is detected.
- (Optional) Build a custom dashboard (web app) that reads from DynamoDB and displays detected wildlife and intrusion events on a map.
This conceptual framework lays out the foundation for a powerful and effective real-time wildlife monitoring system. The success hinges heavily on the performance of your custom AI model on the ESP32-CAM and the robustness of your LoRa network in challenging forest environments.
10. AI-Driven Smart Helmet for Construction Workers
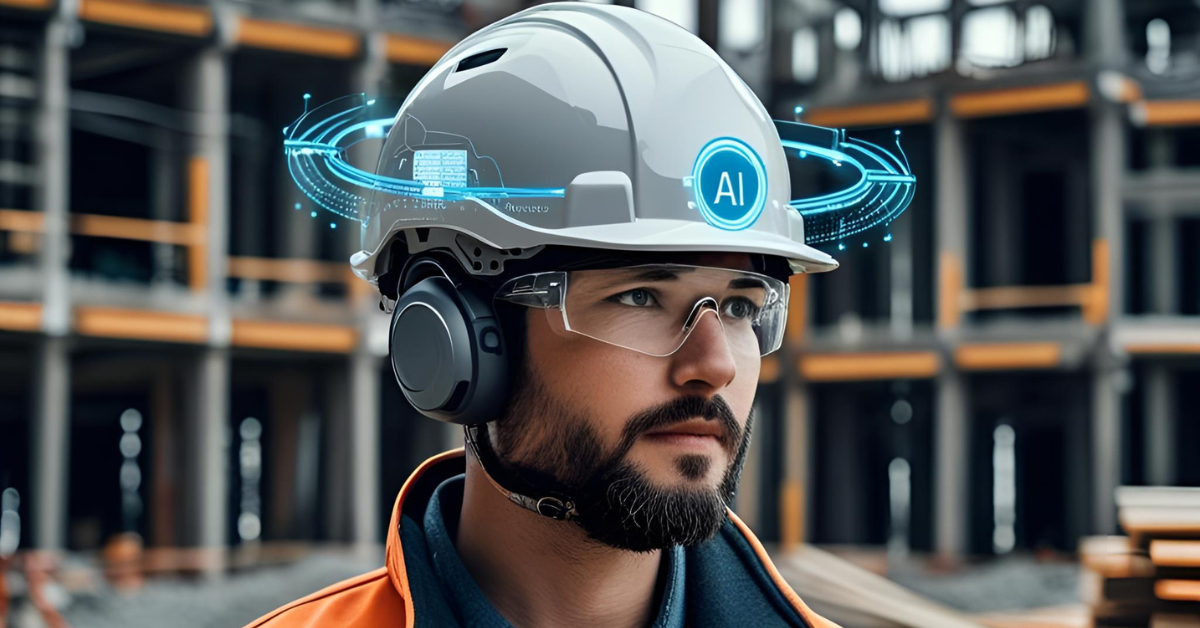
💡 Objective
To significantly enhance safety on construction sites by providing real-time monitoring of worker well-being, detecting potential hazards in the environment, and alerting for risky behaviors. This system aims to proactively mitigate risks, reduce the incidence of accidents, and prevent fatalities by providing timely, actionable insights to workers and supervisors.
🚀 Project Overview
Construction sites are inherently dangerous environments. Manual oversight can miss subtle signs of fatigue, immediate environmental threats, or instances of non-compliant/risky actions. This project proposes an AI-driven smart helmet designed to be a continuous safety guardian for workers. The helmet integrates several sensors connected to an ESP32 microcontroller. An MPU6050 (accelerometer and gyroscope) tracks head movements and posture, indicating falls, sudden impacts, or unusual stillness. A Pulse Sensor monitors heart rate, providing an indication of stress or physiological strain.
Crucially, the system employs AI at two levels:
- Eye State Monitoring (for Fatigue): A miniaturized camera (if feasible on ESP32-CAM) or dedicated eye-tracking sensor captures images of the worker's eyes. A lightweight Convolutional Neural Network (CNN), optimized for edge inference, analyzes eye movements (e.g., blink rate, eye closure duration - PERCLOS) to detect signs of drowsiness or severe fatigue.
- Motion Behavior Analysis: Data from the MPU6050 is fed into a Decision Tree model (or a set of rule-based algorithms derived from a DT) to identify risky behaviors such as sudden falls, prolonged periods of no movement (indicating incapacitation), or rapid, erratic head movements. Environmental sensors (e.g., gas sensors for CO/H2S) can be integrated to detect hazardous conditions.
All sensor data, AI inference results (fatigue level, detected behavior, hazard alerts), and helmet status are wirelessly transmitted via Wi-Fi (if available) or a lightweight protocol to a central MQTT broker. This data is then ingested by Grafana, a powerful open-source analytics and visualization platform, allowing site supervisors to view real-time dashboards of worker status, receive immediate alerts for critical events (falls, high fatigue, gas leaks), and analyze safety trends over time. Local alerts (buzzer, LED) on the helmet provide immediate feedback to the worker. This proactive system transforms safety management, making construction sites safer and more productive.
🎛️ Components
- Edge Computing Device: ESP32 Microcontroller (e.g., ESP32-WROOM series or ESP32-CAM if eye monitoring via camera) – The brain of the helmet, managing sensors, running AI models, and handling communication. Its Wi-Fi capability is key for real-time data streaming.
- Motion & Orientation Sensor: MPU6050 (3-axis accelerometer + 3-axis gyroscope) – Mounted inside the helmet to detect head movements, orientation, sudden impacts (falls), and prolonged stillness.
- Physiological Sensor: Pulse Sensor (or PPG sensor for heart rate) – Integrated into the helmet lining to measure the worker's heart rate, providing insights into stress levels or unusual physiological states.
- Eye State Monitoring (Optional/Advanced):
- Miniature Camera Module (e.g., OV2640 with ESP32-CAM): Positioned to capture the worker's eye region. Note: Running a CNN for eye state on ESP32-CAM is challenging due to limited RAM and processing power; may require significant model optimization or a more powerful edge AI module.
- Alternative (Non-Camera): Electrooculography (EOG) sensors or infrared eye tracking modules for simpler fatigue detection might be considered, though more complex to integrate.
- Environmental Sensors (Optional):
- Gas Sensors: (e.g., MQ series for CO, LPG, smoke; MQ136 for H2S) – To detect hazardous gases in the immediate environment.
- Temperature/Humidity Sensor: (e.g., DHT11/DHT22, BME280) – For environmental monitoring.
- Alert Mechanism:
- Miniature Buzzer: For audible alerts directly to the worker.
- LEDs: For visual alerts (e.g., green for safe, yellow for caution, red for danger).
- Vibration Motor: For tactile feedback.
- Power Source: Rechargeable LiPo Battery with a charging circuit, sized to last a full work shift.
- Connectivity: Integrated Wi-Fi on ESP32 for communication with local network/cloud.
- Helmet Integration: Custom mounts, padding, and wiring to securely and comfortably embed components into a standard safety helmet.
💻 Technologies Used
- Edge Computing: The ESP32 processes raw sensor data, runs the lightweight AI models (CNN for eye state, Decision Tree for motion), and decides on local alerts, minimizing latency for critical safety functions.
- AI Models:
- Convolutional Neural Network (CNN) for Eye State: A highly optimized and quantized CNN model (e.g., developed with TensorFlow and converted to TensorFlow Lite Micro) for real-time inference on the ESP32-CAM. Trained to classify eye states (open, closed, half-open) and calculate PERCLOS (Percentage of Eye Closure over time) to determine fatigue levels.
- Decision Tree for Motion Behavior: A machine learning model (or its rule-based equivalent) trained on accelerometer and gyroscope data to classify movements as:
- Fall Detection: Sudden change in orientation and acceleration.
- Impact Detection: High g-forces.
- No Movement/Inactivity: Prolonged period of little to no motion.
- Risky Posture: Head angles indicating unsafe positions.
- The model can be implemented directly in C++ logic after training with libraries like
scikit-learnin Python.
- AI Framework (Edge): TensorFlow Lite Micro – Enables deployment of the optimized CNN model directly onto the ESP32 for on-device inference.
- Sensor Data Fusion & Filtering: Algorithms (e.g., Kalman Filters) on the ESP32 to combine and smooth data from multiple sensors for more accurate insights.
- Communication Protocol: MQTT (Message Queuing Telemetry Transport) – A lightweight publish/subscribe messaging protocol for sending sensor data, AI inference results, and alerts from the ESP32 to a central MQTT broker.
- Time-Series Database (Optional, for large scale): InfluxDB or Prometheus (with appropriate exporters) – Optimized for storing time-series sensor data.
- Visualization & Alerting: Grafana – An open-source platform used to create interactive dashboards to visualize real-time sensor data, AI-detected states (fatigue levels, behavior classifications), and historical trends. It can be configured to trigger alerts (email, SMS, Slack) to supervisors based on predefined thresholds.
- Backend (Optional for complex systems): Node.js/Python (Flask/Django) with a database (e.g., PostgreSQL, MongoDB) for user management, device registration, and advanced analytics/reporting.
🌐 Use Cases of the Project:
- Construction Sites: Primary use case. Continuous monitoring of all workers for fatigue, falls, and hazardous environments.
- Industrial Plants/Factories: Monitoring workers in high-risk zones, confined spaces, or areas with potentially hazardous air quality.
- Mining Operations: Detecting fatigue in heavy machinery operators and ensuring safety in underground environments.
- Logistics & Warehousing: Monitoring forklift operators or workers in busy, accident-prone environments.
- Emergency Services/First Responders: Providing real-time well-being data for firefighters, paramedics, or search-and-rescue teams in dangerous situations.
- Sports & Recreation (similar tech): Monitoring athlete fatigue, impact detection for contact sports.
✨ Benefits of this Project:
- Reduced Accidents & Fatalities: Proactive alerts for fatigue, falls, and hazards enable immediate intervention, significantly lowering accident rates.
- Enhanced Worker Safety: Provides a continuous "safety net" for workers, particularly those in high-risk roles or solitary tasks.
- Real-time Situational Awareness: Supervisors gain instant visibility into worker well-being and site conditions via dashboards.
- Improved Productivity: By mitigating risks, work can proceed more safely and efficiently, reducing downtime due to incidents.
- Data-Driven Safety Management: Collects valuable data on incident patterns, fatigue triggers, and environmental risks, allowing for continuous improvement of safety protocols.
- Compliance & Reporting: Provides objective data for safety audits, regulatory compliance, and incident investigation.
- Non-Intrusive Monitoring: Unlike constant direct supervision, the helmet offers unobtrusive monitoring while respecting worker privacy (data focused on safety metrics, not constant surveillance).
- Cost Savings: Reduces costs associated with accidents (medical expenses, worker's compensation, legal fees, project delays).
- Adaptability: The modular design allows for integration of various sensors and AI models to address specific site challenges.
- Worker Empowerment: Workers feel more secure knowing their well-being is being actively monitored and support can be dispatched quickly if needed.
I will provide conceptual code snippets for the core components that would run on the ESP32, focusing on:
- ESP32 Firmware (Arduino C++): Reading sensor data (MPU6050, Pulse Sensor, conceptual eye state), implementing the Decision Tree logic, triggering local alerts, and publishing data to an MQTT broker.
- Python Script (for MQTT Bridge/Data Ingestion to Database): A simple script that would run on a server or local machine to receive MQTT messages and conceptually push them to a time-series database (like InfluxDB for Grafana).
- Grafana Setup (Conceptual): How you'd visualize this data.
Prerequisites (Conceptual):
- ESP32 Development Environment: Arduino IDE with ESP32 board support, or PlatformIO.
- Libraries for ESP32:
Wire.h(for I2C with MPU6050)Adafruit_MPU6050.h(or similar MPU6050 library)PubSubClient.h(for MQTT)ArduinoJson.h(for JSON serialization)WiFi.h- (For Pulse Sensor: typically analog read, no specific library)
- (For Eye State CNN:
TensorFlow Lite Microintegration, which is very complex for ESP32-CAM and would involve a separate optimized model and pre/post-processing).
- MQTT Broker: A local or cloud MQTT broker (e.g., Mosquitto, HiveMQ, or an AWS IoT/Azure IoT endpoint).
- Python Environment (for MQTT Listener):
paho-mqtt,influxdb-client(if using InfluxDB). - Grafana: Installation on a server, connected to a time-series database.
Project 10: AI-Driven Smart Helmet for Construction Workers Codes:
🔗 View Project Code on GitHub3. Grafana Setup (Conceptual)
- Install Grafana: Follow official Grafana documentation for installation on your server.
- Install InfluxDB: Follow official InfluxDB documentation to set up a time-series database.
- Data Source: In Grafana, add a new data source. Choose
InfluxDBand configure it with your InfluxDB URL, token, organization, and bucket. - Create Dashboards:
- Telemetry Dashboard:
- Add graphs for
temperatureC,heartRate,fatigueLevel(over time, grouped bydeviceId). - Add gauges for
isSafestatus (e.g., 0 for unsafe, 1 for safe, with color thresholds). - Display
motionStateas a table or a state timeline.
- Add graphs for
- Alerts Dashboard:
- Display a table showing
alertType,message,deviceId, andtimestampfrom thehelmet_alertsmeasurement. - Create Grafana Alerts based on thresholds for
fatigueLevel,isSafe(when it goes to false), or specificmotionStatevalues (Erratic/Impact,No Movement). Configure alert notifications (email, Slack, PagerDuty).
- Display a table showing
- Telemetry Dashboard:
Steps to Implement and Run (Conceptual):
- Hardware Assembly:
- Integrate the ESP32, MPU6050, Pulse Sensor, Buzzer, and LEDs into the helmet. Ensure robust, comfortable, and safe mounting.
- Wire the sensors to the correct ESP32 pins.
- ESP32 Firmware:
- Update
YOUR_WIFI_SSID,YOUR_WIFI_PASSWORD, andYOUR_MQTT_BROKER_IP_OR_HOSTNAMEin the Arduino sketch. - Upload the code to your ESP32.
- Update
- MQTT Broker:
- Set up an MQTT broker (e.g., Mosquitto on a local server, or use a cloud MQTT service).
- Database & Grafana Server:
- Install InfluxDB and Grafana on a server (local or cloud).
- Configure InfluxDB with your organization, bucket, and API token.
- Run the Python
mqtt_listener.pyscript on this server, ensuring it can connect to both your MQTT broker and InfluxDB. Set its environment variables for InfluxDB.
- AI Model Training (for Eye State CNN):
- This is a major separate effort. Collect a dataset of eye images (open, closed, half-open) for different individuals under various lighting conditions.
- Train a lightweight CNN model using TensorFlow/Keras.
- Convert and optimize the trained model to
.tfliteformat for TensorFlow Lite Micro deployment. - Integrating this model into the ESP32 firmware would involve
TensorFlow Lite Microlibrary and significant C++ development for image preprocessing and model inference on the ESP32-CAM. The providedsimulateFatigueLevelis a placeholder.
- Grafana Dashboard Setup:
- Log into Grafana.
- Add InfluxDB as a data source.
- Create dashboards and alerts to visualize the data.
This detailed conceptual code provides a solid foundation for building an AI-Driven Smart Helmet. Remember to prioritize safety, privacy, and robust error handling in a real-world deployment.
The Dawn of Conscious Systems: Beyond Connected, Towards Intelligent AIoT
The projects we've explored—from personalized HVAC to real-time wildlife monitoring and smart construction helmets—underscore a pivotal shift in technology. We're moving beyond mere connectivity to a new era where devices don't just exchange data; they become thinking systems. These aren't just "smart" in the conventional sense; they are conscious entities designed to perceive, analyze, and act autonomously, learn from their experiences, and scale their intelligence in real-time.
At the heart of this transformation lies the seamless integration of Artificial Intelligence (AI) with the Internet of Things (IoT). AI provides the brains, enabling devices to make sense of vast streams of sensor data, recognize patterns, predict future states, and make intelligent decisions at the edge or in the cloud. IoT provides the nervous system, extending our digital reach into the physical world, collecting rich, real-time data from environments previously unmonitored. When combined, AIoT systems can optimize performance, enhance safety, conserve resources, and deliver unprecedented levels of personalization and efficiency.
Building AIoT projects is no longer a niche skill; it's rapidly becoming a fundamental competency for future innovation. It's your ticket to shaping industries from smart cities and sustainable agriculture to advanced healthcare and environmental conservation. The ability to design, develop, and deploy these intelligent, interconnected systems will define the next generation of technological leaders and problem-solvers.
So, it's time to plug in, level up, and start building. Embrace the power of edge computing with microcontrollers like the ESP32, leverage the vast capabilities of cloud platforms such as Azure and AWS for data processing and AI model deployment, and delve into machine learning frameworks like TensorFlow Lite. The journey into AIoT is an exciting one, promising not just innovation, but also the potential for profound positive impact on our world. Because in the dynamic and evolving world of AI + IoT, the ultimate goal isn't just about ensuring devices are connected; it's about empowering them to be truly conscious.
🚀 About This Program — Industry Ready IOT Program
By 2030, everything won’t just be connected — it’ll be intelligent.
From self-optimizing factories to health wearables that think, AIoT is the brain-meets-body moment of tech. Every sensor now learns. Every machine now adapts. This isn’t just the Internet of Things — it’s the Intelligence of Things.
🛠️ The problem?
Most courses teach IoT like it’s 2014 — basic Arduino kits, hardcoded logic, zero AI. Meanwhile, the industry is starving for AIoT engineers who can build smart, adaptive, and real-time systems that sense, predict, and act — from the edge to the cloud.
🔥 That’s where Huebits changes the game.
We don’t train you to just understand AI or IoT.
We train you to build intelligent, connected ecosystems that learn from data and deliver decisions — not just readings.
🎓 Welcome to the 6-Month Industry-Calibrated IoT Program.
Designed for serious builders, this program arms you with the skills to develop edge intelligence, run AI models on microcontrollers, and create cloud-connected workflows that drive real-world automation and insight.
From mastering Python, Embedded C, and MicroPython to deploying ML models on ESP32, Raspberry Pi, and integrating with AWS IoT, Azure IoT Hub, and TensorFlow Lite — you'll go from zero to deployment-grade AIoT innovator.
🎖️ Huebits-Certified AIoT Engineer Credential
Earn a credential that proves you can code firmware, compress models, analyze data, and deploy intelligent devices — backed by industry and built for the future of smart systems.
📌 Why This IoT Program Hits Different:
✅ Hands-on Edge AI + Embedded ML Projects
✅ Sensor Fusion, Anomaly Detection & Predictive Maintenance
✅ Cloud Integration with AWS IoT, Azure, Grafana & Node-RED
✅ LMS Access for One Full Year
✅ Job Guarantee Upon Successful Completion
💥 Your future employer doesn’t care how many buzzwords you know.
They care if you can run an ML model on a 512KB device and stream that insight to the cloud in real-time — securely, reliably, and at scale.
Let’s make that happen.
🎯 Join Huebits’ Industry-Ready IoT Program
and become the bridge between intelligence and connectivity — byte by byte, insight by insight.

🔥 "Take Your First Step into the AI + IoT (AIoT) Revolution!"
Ready to engineer systems that don’t just connect — but think, learn, and act?
Join the Huebits Industry-Ready IoT Program and gain hands-on experience building intelligent edge systems with sensors, microcontrollers, AI models, and real-time cloud integrations — using the same tech stack trusted by top AIoT startups and enterprises.
✅ Live Mentorship | 🤖 Edge AI Projects | 🌐 Future-Proof AIoT Curriculum